Quantcast
Channel: PlayStation – VG247
Viewing all 10714 articles
Browse latest View live

PlayStation Plus games for April include Lovers in a Dangerous Spacetime, Alien Rage

$
0
0

Earlier this month, Sony announced arena shooter Drawn to Death would be one of its PlayStation Plus games for April. Now, the full list of offerings have been posted.

Along with Drawn to Death from The Bartlet Jones Supernatural Detective Agency, PlayStation 4 players will also be handed Lovers in a Dangerous Spacetime – the co-operative, space-shooter, exploration title.

PS4 and Vita Cross Buy titles 10 Second Ninja X and Curses ‘n Chaos will be available, and PS3 owners can grab Alien Rage and Invizimals: The Lost Kingdom.

All will be made available on April 4, which means you have until then to grab March’s lineup: Tearaway Unfolded, Disc Jam, Lumo, Under Night In-Birth Exe:Late, Earth Defense Force 2025 and Severed.

Hit up the links to the PlayStation Blogs above for additional information.


First look at Star Wars Battlefront 2 coming April 15 at Star Wars Celebration

$
0
0

EA has confirmed we’ll get our first look at Star Wars Battlefront 2 at the Star Wars Celebration next month.

rendition1.img

The next entry in the Star Wars Battlefront series will be shown via a trailer on April 15 at 11.30am PT/2.30pm ET/ 7.30pm UK.

It will be shown during the “The Galaxywide Premiere of Star Wars Battlefront 2” panel. You’ll be able to watch online.

During the session, developers from DICE, Criterion and Motive will offer a glimpse at the game and debut the first trailer. It was previously announced that Jade Raymond’s EA Motive and development studio Criterion were lending DICE a hand on the title.

EA announced earlier this month it would be attending Star War Celebration in Orlando, Florida and it was obvious from the start it would reveal the game during the event. Star Wars: Battlefront 2 is out later this year, and Star Wars Celebration is the same event where EA revealed the first look at Star Wars Battlefront.

It even announced the final DLC, Rogue One: Scarif, during a Star Wars Celebration Europe panel.

Star Wars Battlefront 2 is expected to be a larger game with more locations, more heroes and even more characters spanning multiple Star Wars eras. It will also “leverage content” from Star Wars Episode 7: The Force Awakens and Episode 8: The Last Jedi.

Star Wars Celebration takes place in Orlando, Florida April 13–16.

Dark Souls 3: The Ringed City walkthrough – Mausoleum Lookout to Ringed Inner Wall

$
0
0

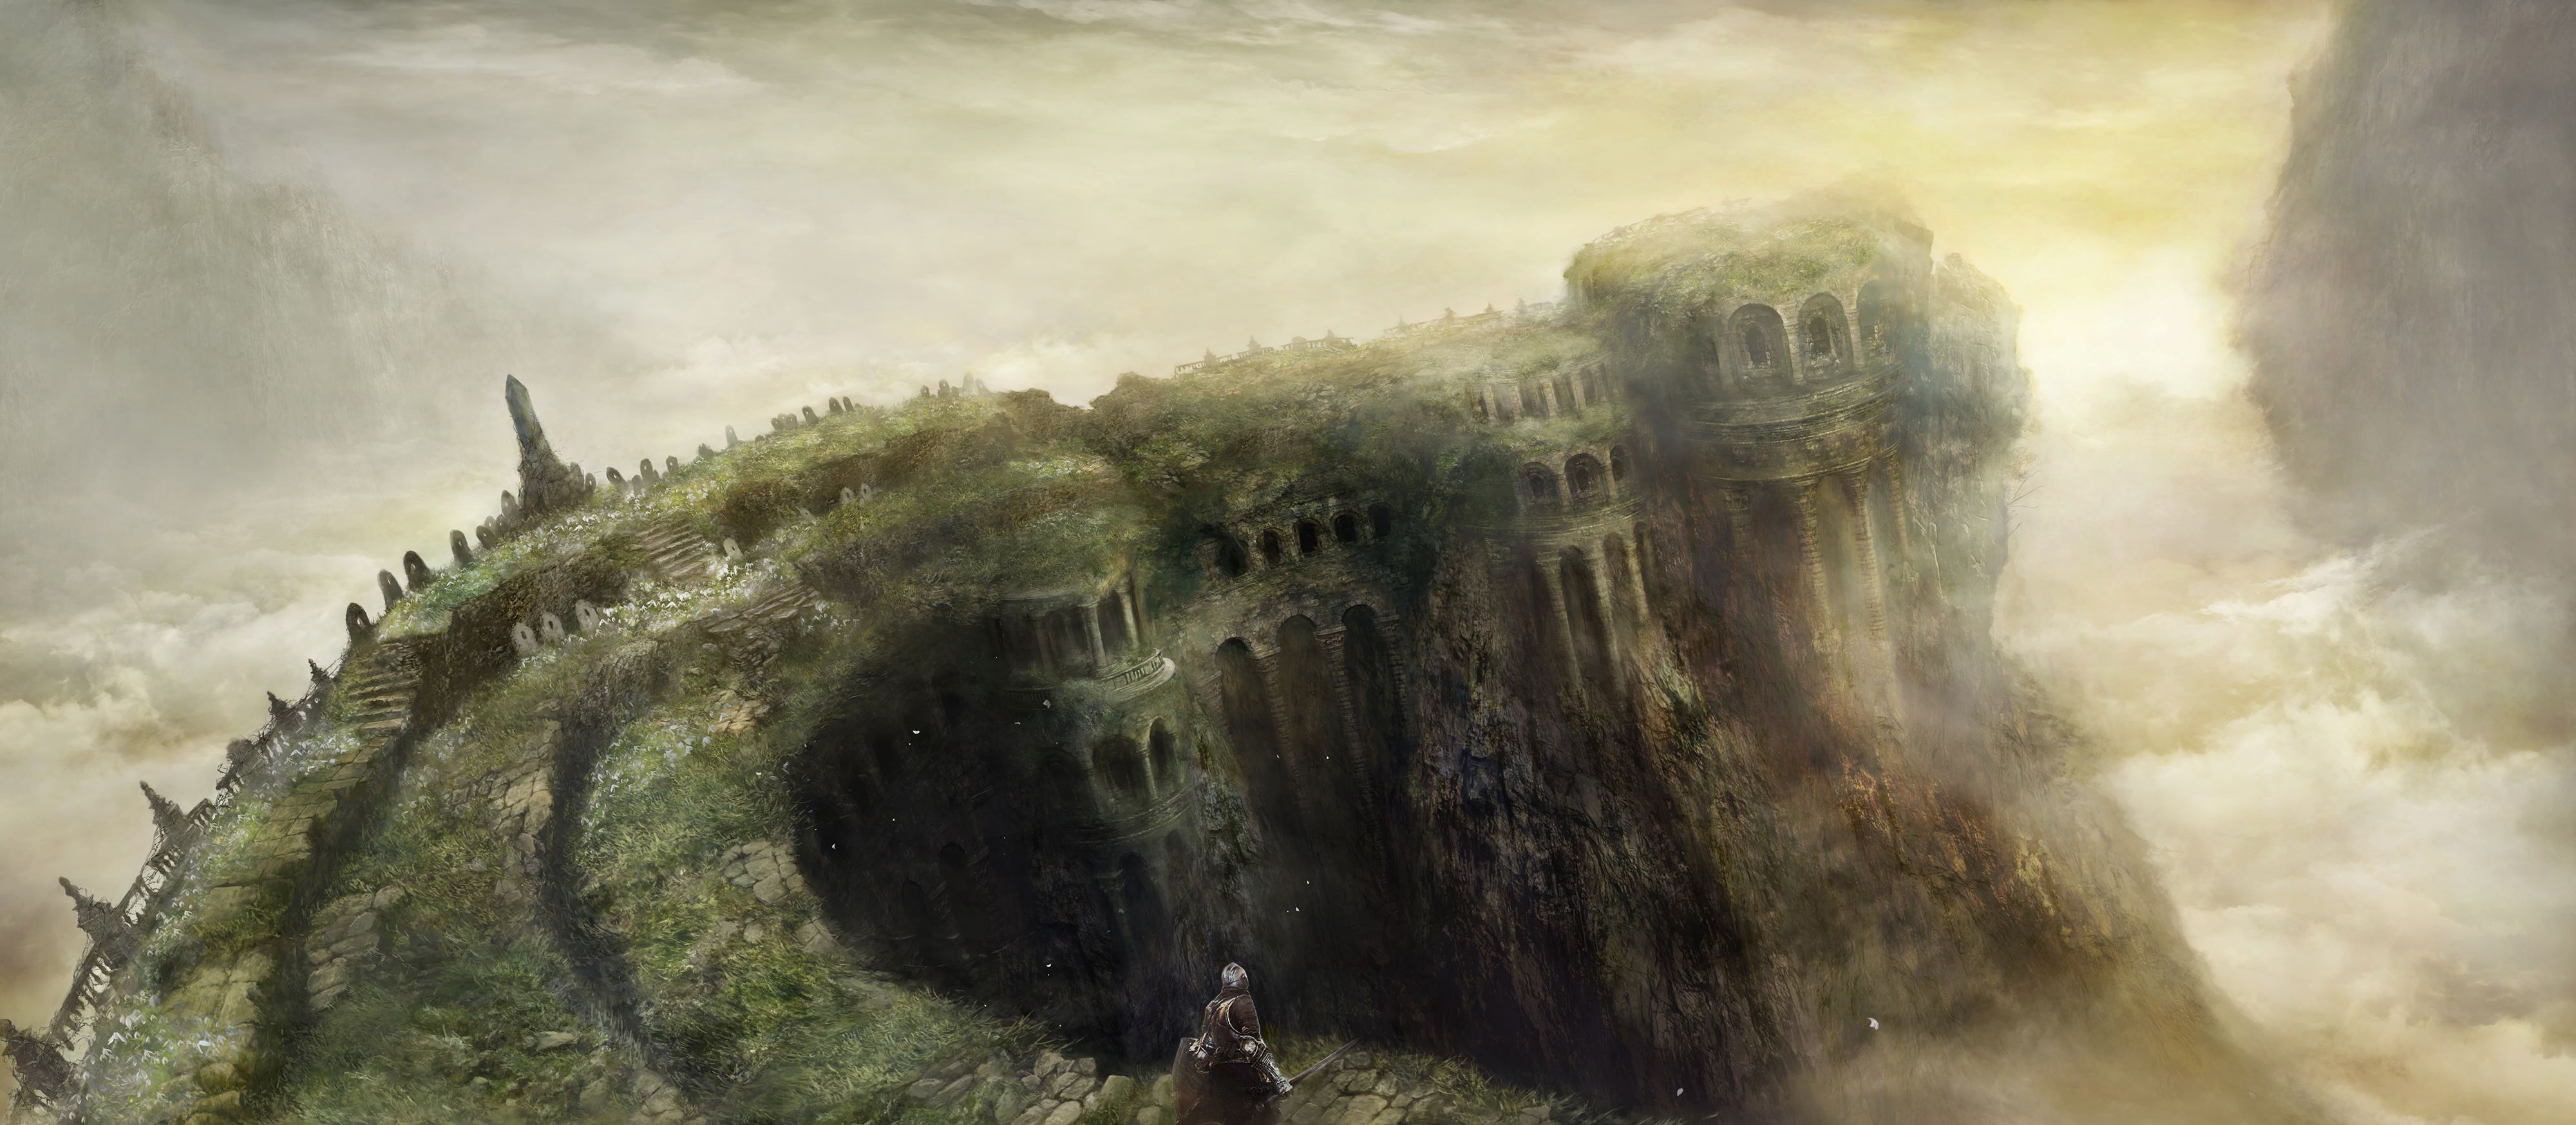
The Ringed City proper begins here, with the Mausoleum Lookout bonfire. Let’s deal with the Grey Giant and get inside the titular ring.

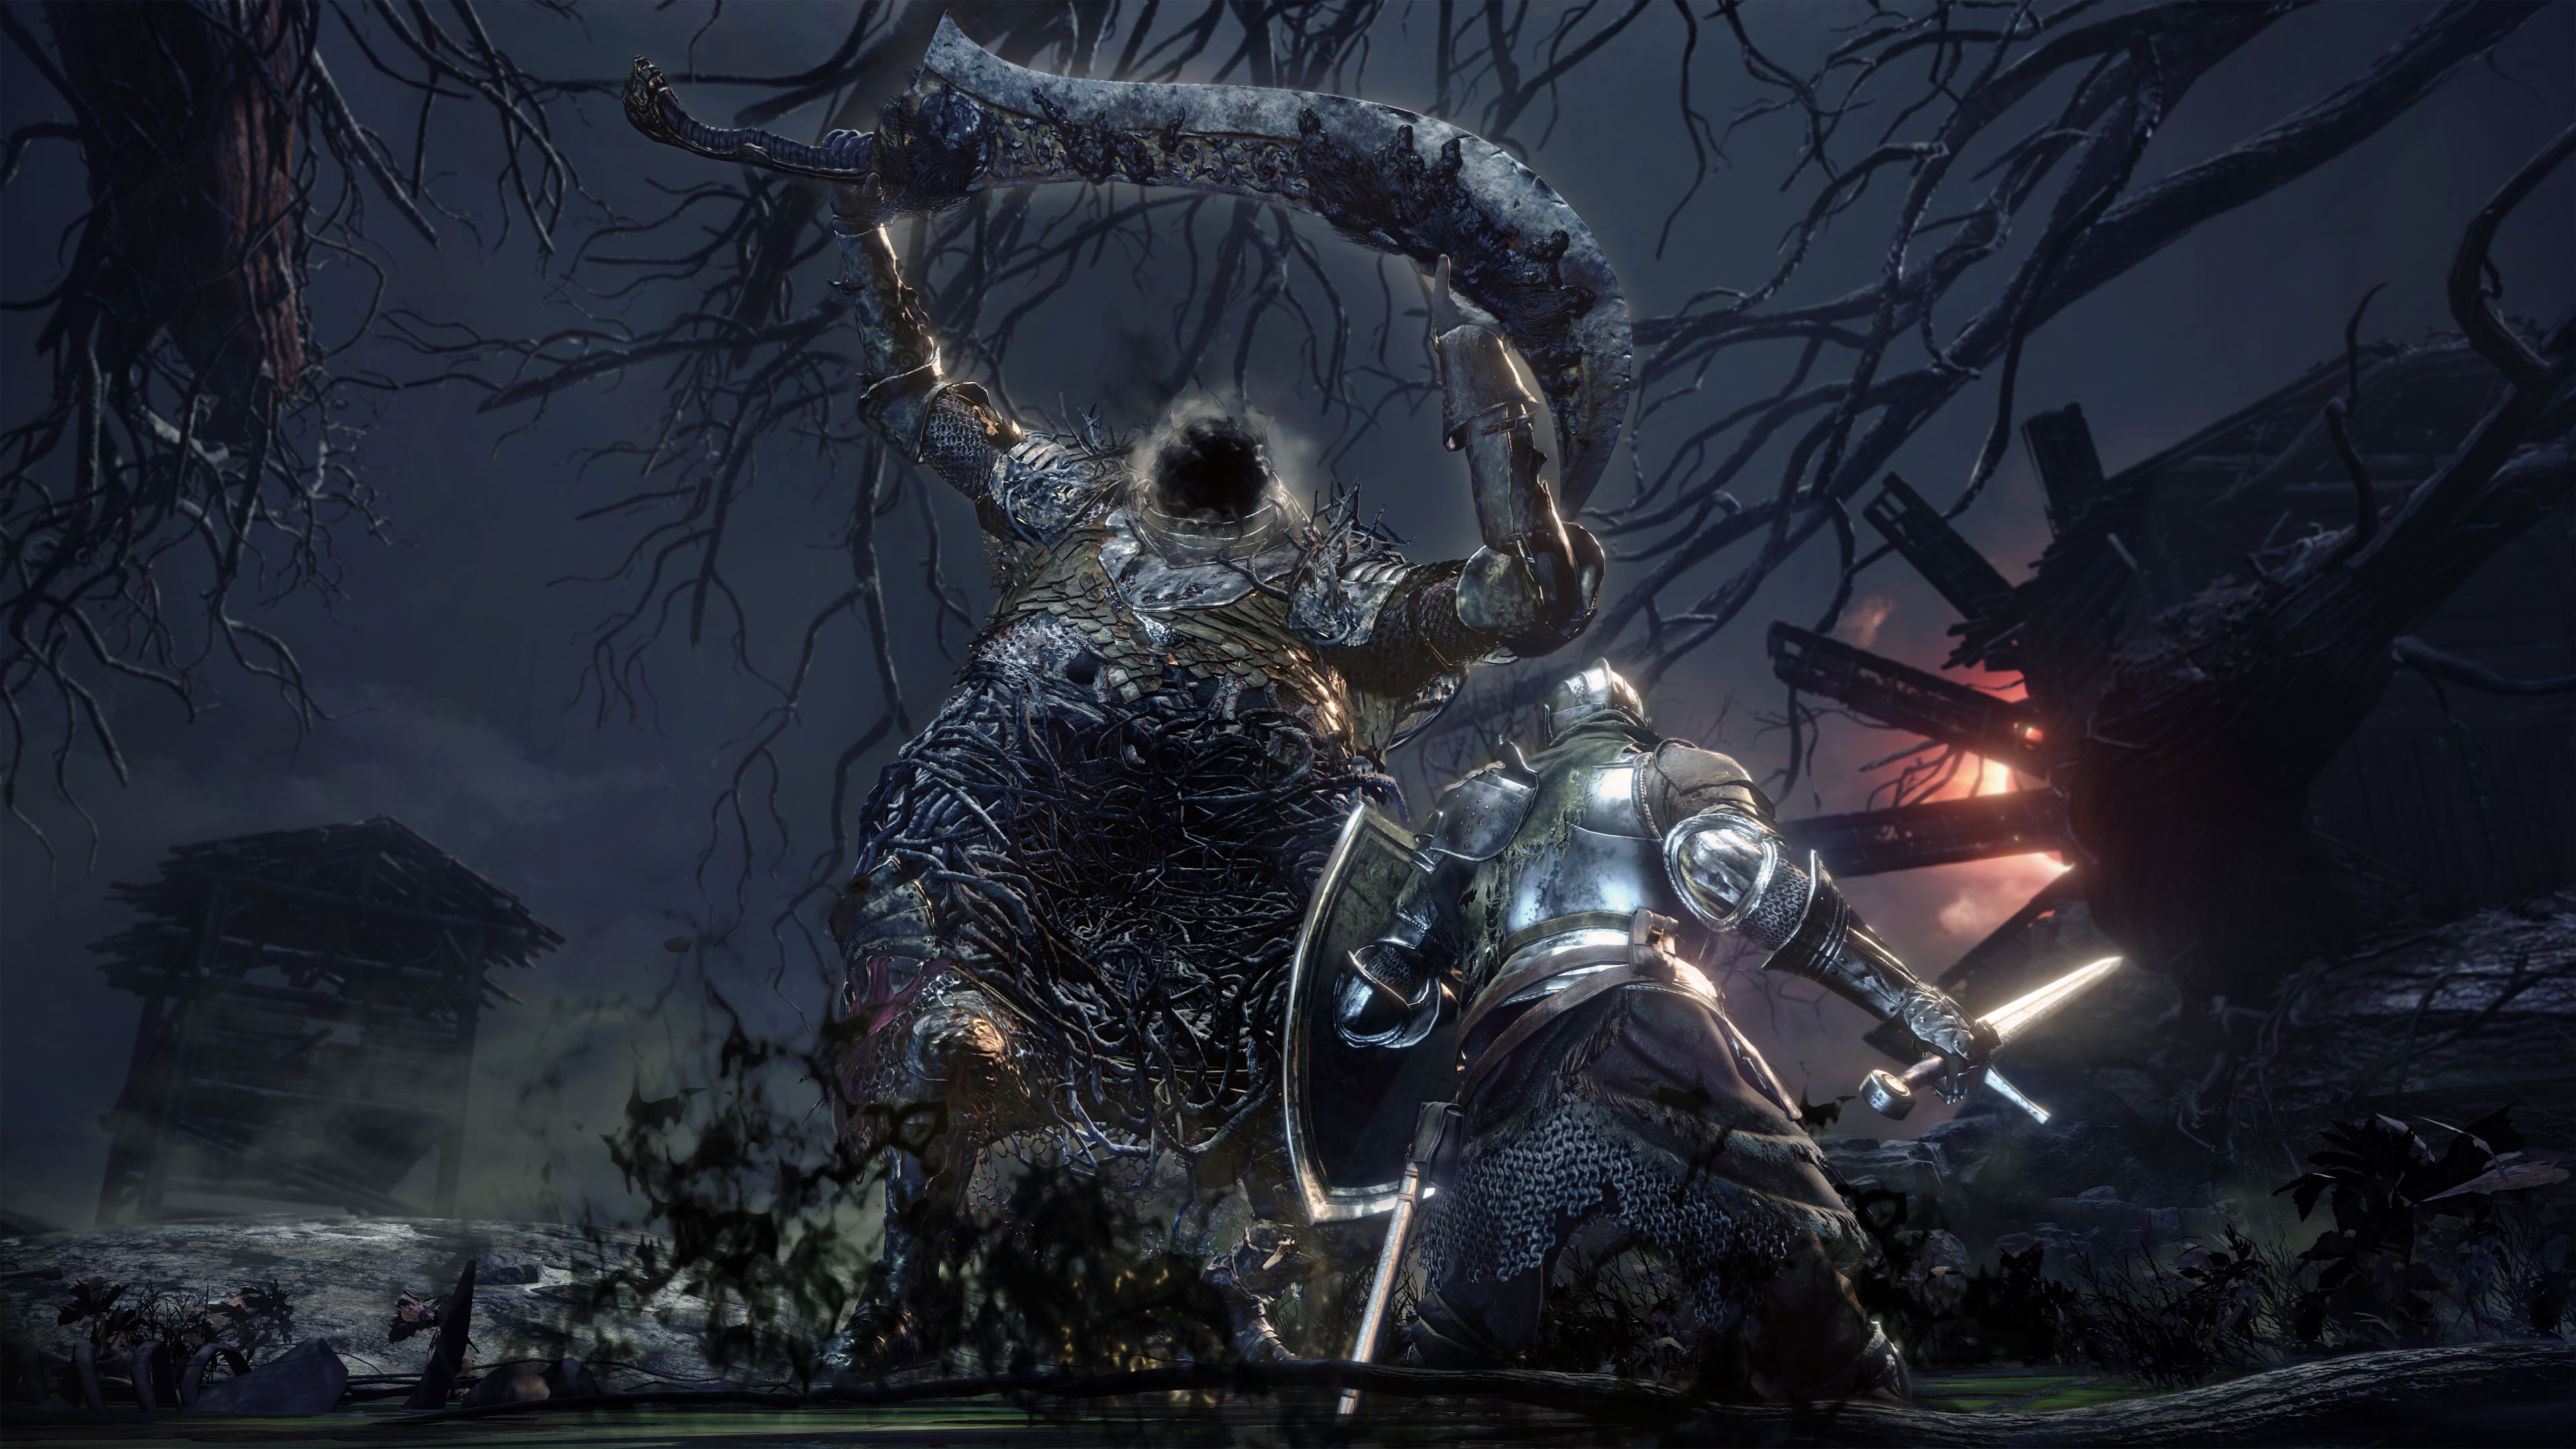
dark souls 3 the ringed city dlc

In this chapter of our Dark Souls 3: The Ringed City walkthrough, we press into The Ringed City itself – up until now we’ve just been wandering through the Dreg Heap at the edges of the world, which is all that’s left at the closing of the age of fire.

Now we’re really going to see something, and the lore starts to get super interesting. If you’ve just tuned in and are wondering how we got to Mausoleum Lookout, we came via The Demon Prince boss battle , which was backdated to avoid spoiling the boss name in a headline.

Also, don’t worry about that area back at the Earthen Peak Ruins; we’ll be back there sometime later once we’ve puzzled out some of its mysteries. This is the right path, we promise.

If you’re still in ember form, be sure you’ve spent any spare souls; invaders have been spotted in this area.

Cross the wall of The Ringed City

So: Mausoleum Lookout. It’s lovely here, isn’t it? But don’t get distracted by the view. As you move towards and down the stairs, a grey giant at the far end of this curving wall signals, and a horde of phantom archers appears, salutes, and fires several volleys at you. If you’re not in cover, you’re bollocksed.

You should trigger this and retreat, at least once, to watch it happen and understand the rhythm of it (and also to wonder why the phantoms look like Warriors of Sunlight). Be sure to put stone between you and the archers while you watch.

When you’re ready to press on, wait for a break in the phantom archers, then run down and take shelter behind the first set of gravestones on the right.

Optionally, turn around to face behind you, wait for a break in the phantom archers, and run back towards the stairs, but pass to their left, hugging them to find a small shelter here. Wait out the storm here, then make a break to run even further back, around the curved stone wall, for the Ruin set. Return to the first set of gravestones.

Here’s what we’re going to do: we’re going to wait for a gap in the fire then run around the first gravestone to the left, and then around the second gravestones to the right, and shelter behind the third set of gravestones tucked just beyond the second – you can’t be hit from any direction here, as long as you’re well inside the little alcove.

Take a look around while you can. Ahead of you, on the right, is a flat, round area, and you should spot some crumbling stones on the lip at the far side of it. In the next gap in the archer’s fire, run for that spot and drop down, then drop down one more level. Safe!

A ruin knight golem or even two may rise and follow you down; they’re pretty easy to fight though, as they only take three or four hits to kill and have petty standard moves apart from a rapid somersault towards you. Whenever you’re safe, do grab the Soul of a Crestfallen Knight that’s back in the bonfire direction.

Move on down the path. There’s a crystal lizard and it’s pretty safe to chase it; just don’t fall off the ledge.

Climb the ladder and sprint up the stairs on your right. At the top, take an immediate right and get around the corner to cover from the archers. But don’t imagine you are safe! In this area, the phantoms summoned by the grey giant include melee units who appear under your feet, swinging great clubs. They vanish with the rest, so all you need to do is get out of their range. Additionally, the giant has both fire and melee attacks itself if you approach it. You need to go right down the rear stairs and around the corner, where you can talk to the friendly NPC in the alcove, before you’re safe.

dark_souls_3_ringed_city_screen_grey_giant_1

Killing the Grey Giant

This section is optional, but you can grab the treasure scattered across the wall if you’re willing to kill the giant. It does respawn so have a look at what’s listed below and see if you think it’s worth the hassle.

There are several ways to kill the giant and all rely on finding a gap in its summon patterns in which you can damage it without being destroyed – or having the giant itself attack you directly.

What I did was stand on the stairs behind the giant, about halfway up, until a melee phantom began to rise at my feet. Then I ran up the stairs, took a shot at the giant, and ran back down, avoiding both the original melee phantom and a potential second one conjured at the top of the stairs while I was taking my shot.

The giant drops a Divine Blessing. After it is dead, watch out for two ruin knight golems who are usually wandering around up here; they actually rise when you first climb the ladder, so you might have dealt with them already, or noticed them fall down the ladder earlier, if you didn’t get up that ladder and away quick smart.

As you move away from the giant’s throne and back along the wall, look for a lower area to your left with two item glows. You can collect some budding green blossom and a Large Soul of a Weary Warrior here. There’s also a small tunnel entrance; there’s a Hidden Blessing inside (and no nasty traps, surprisingly).

As you progress back towards the confire, you’ll also encounter an ember two titanite chunks and more budding green blossom. Remember not to rest at the bonfire or all this will happen again.

dark_souls_3_ringed_city_screen_bridge_wall_1

Moving on to the next bonfire

Past the giant’s throne, continue on beyond the friendly NPC in the alcove, but watch for an ambush from the next one. Let’s call these guys wretches until I find out what they are.

Moving on you’ll see another wretch sitting staring over the landscape. It’s a trap; a third wretch is waiting above on your left.

Advance until the ramp ends and be wary of another wretch who will climb up from your right if you go past; flail at where you can see his hands poking up to get him to come up early. He won’t fall off, unfortunately.

Up next

Coming soon.

Yet another wretch is waiting to drop down on you from above and left as you approach the item, so shoot it down before proceeding – and yes, there’s one last wretch who climbs up from behind the item itself. It’s a purging stone.

Go back a little and through the door to activate the Ringed Inner Wall bonfire. That wasn’t so bad, hey? Let’s see what tomorrow brings.

Horizon Zero Dawn guide: all main and side quests, Cauldron locations, and how to get All Allies Joined

$
0
0

Horizon Zero Dawn has plenty of content. Make sure you see and do everything before you initiate endgame. Spoilers, obviously.

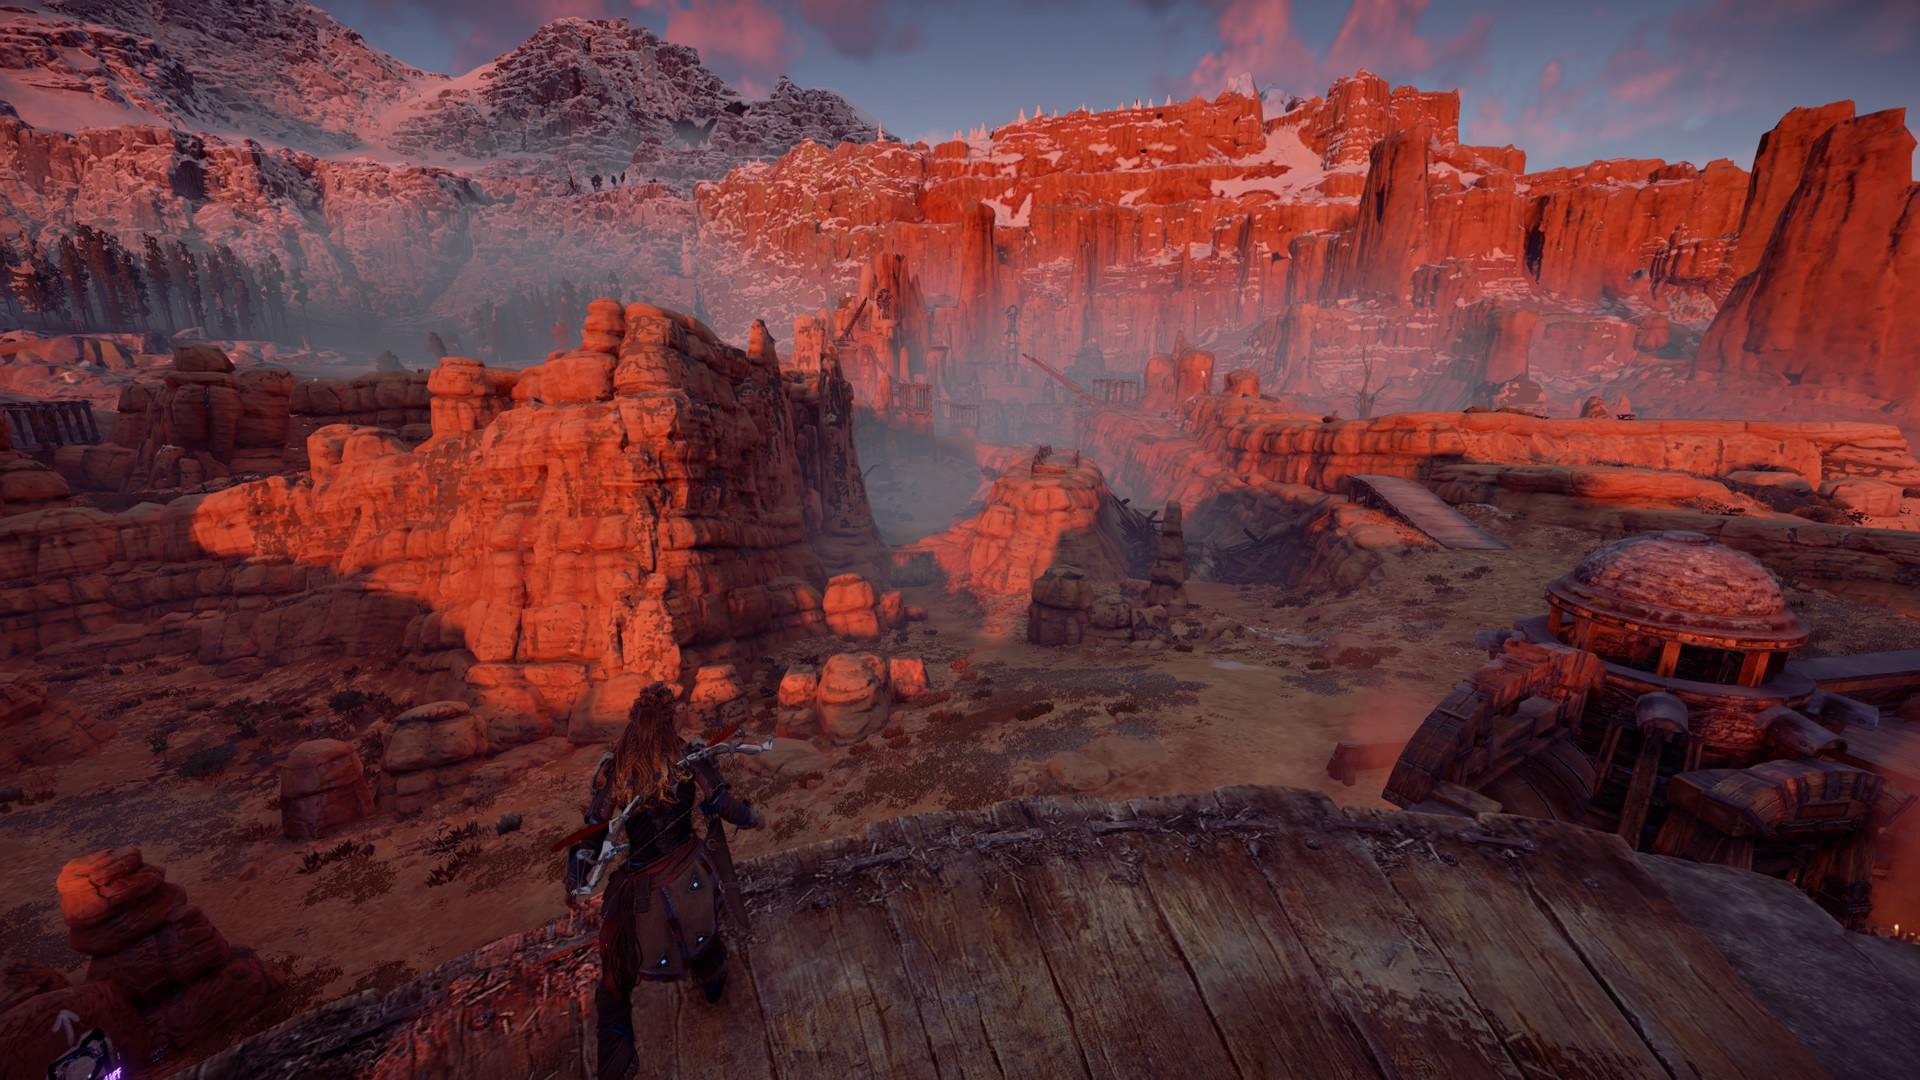
Horizon Zero Dawn™_20170228164241

Horizon Zero Dawn has tens of hours of main quests, side quests and open world content to explore.

This guide page lists all the side quests we found in Horizon Zero Dawn and therefore provides a checklist of tasks to complete on your way to 100% completion, but it also explains the critical mission path and what you’ll need to do when in order to see all the story content. You can go back and fill in anything you missed in Horizon Zero Dawn after you’ve finished the main story, but it means you won’t see some of the extra material available to those who get everything done.

Further down this page, we’ll also provide some guidance on how to find and complete all Horizon Zero Dawn’s option tutorial missions (very rewarding) and where to find all the open world content including Cauldron locations. Use the sidebar box to navigate to what you need.

This page does get a bit spoiler-y talking about what you need to do before Horizon Zero Dawn’s ending for best results, but we’ll be careful not to mention any explicit story details as we go.

Looking for something else? Check our full Horizon Zero Dawn strategy guide.

Horizon Zero Dawn: critical path main story quests

Below you’ll find the quests listed as main story missions in Horizon Zero Dawn’s menu. Occasionally you’ll have more than one main quest available, and apart from the difficulty guidance the quest menu provides, you can do them in any order.

In general we suggest following your original Horizon Zero Dawn questline until you reach The War-Chief’s Trail. Complete that and it’s followup, Revenge of the Nora, before returning to the first questline in A Seeker at the Gates. Level permitting, branch off again at Field of the Fallen, which leads into Into the Borderlands and The Sun Shall Fall, before getting back to Maker’s End. This approach seems to make the most sense narratively given the urgency of each of the quest’s goals.

If you’re looking for sidequest guidance there’s a list below, but in general, tick off everything on the east side of the map (the Sacred Lands) before pushing into Carja Territories, and then do another sweep for the remainder of the map before proceeding through Deep Secrets of the Earth. You’ll be rewarded with acknowledgment of your many accomplishments in Horizon Zero Dawn by dialogue in subsequent scenes.

  • A Gift From The Past
  • Lessons of the Wild
  • The Point Of The Spear
  • Mother’s Heart
  • The Proving
  • The Womb of the Mountain
  • A Seeker at the Gates
    • The War-Chief’s Trail
    • Revenge of the Nora
  • The City of the Sun
    • The Field of the Fallen
    • Into The Borderlands
    • The Sun Shall Fall
  • Maker’s End
  • The Grave-Hoard
  • To Curse the Darkness
  • Deep Secrets of the Earth
    • First point of no return
  • The Terror of the Sun
  • The Heart of the Nora
  • The Mountain That Fell
  • The Looming Shadow
    • Second point of no return
  • The Face of Extinction

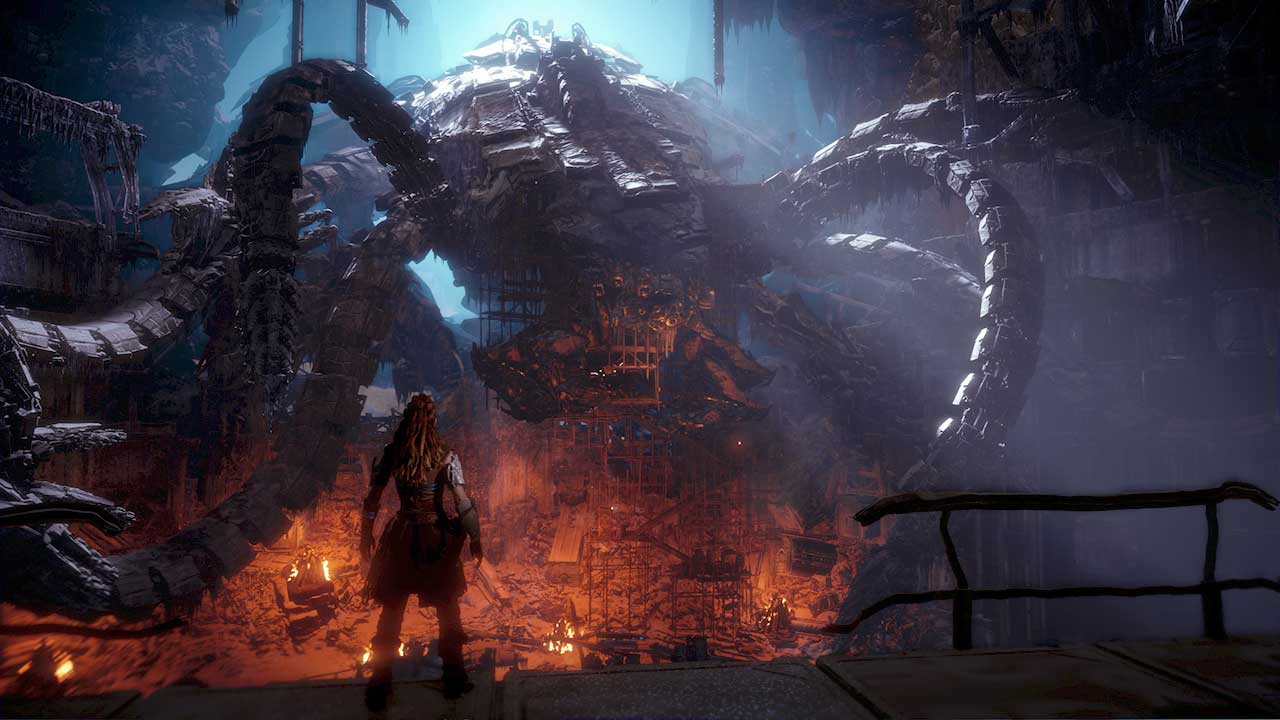
Horizon Zero Dawn™_20170228174248

How to get the best ending and All Allies Joined trophy

Horizon Zero Dawn doesn’t really have multiple endings but if you complete all the major side quests before completing the final mission, you’ll get a stack of extra dialogue and even a trophy – All Allies Joined.

Additionally, there are several dialogue scenes triggered along the critical path, and even at the end of certain side quests, that vary considerably depending on what you’ve completed up until that point.

That’s about all we can tell you without ruining things story-wise, but basically: it’s in your best interest to do every side quest as soon as you can before progressing further down the critical path. The final point of no return occurs during the mission The Looming Shadow: do not proceed with this quest until you’re sure you’ve done everything you can.

When you have done everything you can do at this point, reap your reward by visiting the two optional objective sites listed in The Looming Shadow’s quest log. With that done, make a backup save just in case, and allow Aloy to go to bed. When you do so, the quest ends and you should receive your All Allies Joined trophy.

(Don’t worry too much if you faff this up; the extra dialogue is nice but you’re not missing anything super essential and it doesn’t count towards completion statistics.)

Here are the quests and side quests that seem to effect dialogue during The Looming Shadow and your chances of getting the trophy:

  • The War-Chief’s Trail and Revenge of the Nora (main quests)
  • The Field of the Fallen, Into the Borderlands and The Sun Shall Fall (main quests)
  • A Moment’s Peace (side quest)
  • Traitor’s Bounty and Queen’s Gambit (side quests)
  • Hunting for the Lodge (errand)
  • Hunter’s Blind, Deadliest Game and Redmaw (side quests)
  • Heap of Trouble (side quest)
  • Sun and Shadow (side quest)

There’s another point of no return a little earlier in Horizon Zero Dawn, during Deep Secrets of the Earth. The game itself flags this heavily in dialogue. Again, you’ll get extra dialogue if you have done all the major side quests as you continue past this point.

Horizon Zero Dawn™_20170228174601

All Horizon Zero Dawn side quests and errands

Below you’ll find a list of every side quest and errand we found in Horizon Zero Dawn. We’ve grouped them by general region, and put them in the order you’ll likely explore the map in.

Mother’s Embrace

These quests can be found in Horizon Zero Dawn’s starting zone, before Aloy has access to the whole map.

    Side quests
  • The Forgotten
    On the main road south towards Mother’s Watch, look for a tall rock spire. Speak to the woman at the top.
  • In Her Mother’s Footsteps
    North east of Mother’s Watch, along the riverbank, you’ll find an injured man who gives this quest.
    Errands
  • Odd Grata
    Ask Rost “Anything else?” at the beginning of the adult Aloy sequence in the prologue, or encounter Grata at her camp high in the mountains to the west of your starting point.

Horizon Zero Dawn™_20170228174743

The Sacred Lands

All of these quests can be activated before leaving the Nora hunting grounds and crossing into Carja lands at Daytower.

    Side quests
  • Insult to Injury
    Speak to Fia in Mother’s Rise, a settlement found along the mountains forming the border between Mother’s Embrace and the wider Sacred Lands.
  • A Daughter’s Vengeance
    Speak to the worried young man in Mother’s Rise.
  • Ancient Armory
    Explore the Bunker ruins east of Mother’s Rise.
  • A Moment’s Peace
    Speak to Tikuk in the Banuk Encampment at the far north east of the Sacred Lands.
  • Underequipped
    Speak to the worried trader at Hunter’s Gathering, a settlement in the north west of the Sacred Lands, close to the border with Carja.
    Errands
  • Hunting for the Lodge
    Speak to a Keeper at any of the Hunting Grounds arenas.
  • Sanctuary
    Speak to Den in Mother’s Rise.
  • Shortage of Supplies
    Speak to Sona in Mother’s Crown. Must have completed The War-Chief’s Trail and Revenge of the Nora.
  • Luck of the Hunt
    Speak to Taim in Mother’s Crown.
  • To Old Acquaintance
    Speak to Gera at Hunter’s Gathering.
  • Traitor’s Bounty
    Unlocked during a cutscene on the critical path.
  • Queen’s Gambit
    Unlocked upon completion of Traitor’s Bounty.

horizon_zero_dawn_review_1

Meridian

All of these quests can be found in or near Meridian, or are intimately tied to it.

    Side quests
  • Robbing the Rich
    Speak to the noble loudly decrying a robbery near the main market area.
  • Honor the Fallen
    Speak to Mournfall Namman in the circular area on the upper level of the city.
  • Fatal Inheritence
    Speak to Ranaman in Meridian Village, a settlement just south east of the city itself.
  • Hunter’s Blind
    Speak to Talanah in the Hunters Lodge. Must have completed the errand Hunting for the Lodge.
  • Deadliest Game
    Speak to Talanah in the Hunters Lodge. Must have completed Hunter’s Blind.
  • Redmaw
    Speak to Talanah in the Hunters Lodge. Must have completed Deadliest Game.
    Errands
  • Demand and Supply
    Look for two squabbling merchants on the outer edge of Meridian, towards Meridian Village.

Horizon Zero Dawn™_20170228174403

Carja Territories

These quests are available as Aloy roams the wider map beyond the Sacred Lands. Quests found in Meridian and nearby hubs are not included here.

    Side quests
  • Heap of Trouble
    Speak to Petra at Free Heap, a settlement to the north east of Carja territories, close to the border with the Sacred Lands.
  • Hammer and Steel
    Speak to Kaeluf at Free Heap.
  • Death from the Skies
    Find a man wounded on the roads west of Free Heap.
  • Blood on Stone
    Speak to the quarry foreman at Cut Cliffs, a settlement north east of Meridian.
  • Sun and Shadow
    Speak to Lahavis at Brightmarket, a settlement northwest of Meridian.
  • Sunstone Rock
    Approach Sunstone Rock, a settlement far to the southwest of Meridian.
  • Cause for Concern
    Unlocked after completing all Bandit Camps if you’ve met Nil on your journeys.
    Errands
  • In Foreign Lands
    Speak to Balahn at Daytower.
  • Collateral
    Unlocked during The City of the Sun during conversation with Olin.
  • Sun’s Judgment
    Speak to the grumbling stall owner in Brightmarket.
  • A cCrious Proposal
    Speak to Fernund in Brightmarket.
  • Healer’s Oath
    Speak to Abas outside Sunfall.

horizon_zero_dawn_review_3

Cauldron locations for spear upgrades

Cauldrons are worth highlighting above and beyond open world content because they have such a significant role in Horizon Zero Dawn.

These special dungeons offer insight into the origins of and behaviour of the machines – but they also offer you the chance to add deadly tools to your arsenal by upgrading your spear to override more machines.

Override is one of the most powerful tricks in Aloy’s repertoire, so make sure you visit each cauldron as soon as you can. There’s nothing more Horizon Zero Dawn then turning a Thunderjaw loose on a pack of machines, then mopping up the debris.

  • Cauldron Sigma
    In the Sacred Lands, north of Mother’s Crown.
  • Cauldron Rho
    In the Carja Territories, south of Daytower.
  • Cauldron Xi
    In the Carja Territories, far south of Meridian.
  • Cauldron Zeta
    In the Carja Territories, north of the Sunfurrows Hunting Grounds.

Horizon Zero Dawn™_20170218161336

All weapon tutorial missions and how to beat them

Every time you acquire a new weapon in Horizon Zero Dawn, you unlock a short tutorial quest. These offer pretty decent XP for not very much work, but be aware you have to manually select them in your quest journal for your actions to count as progress.

  • Sharpshot Bow
    Kill three Watchers using Precision Arrow shots to the eye.
  • War Bow
    Shoot power cells using Shock Arrows. Scrappers are the easiest targets; just be sure they’re facing away from you and ping them in the canister on their butts.
  • Tripcaster
    Trip three machines with Shock Wires. Any will do.
  • Sling
    Freeze three machines weak to frost damage, such as Lancehorns or Tramplers, with Freeze Bombs.
  • Blast Sling
    Kill multiple (two or more) enemies with single shots from your blast sling. Human enemies in bandit camps or herds of Striders are the easiest targets.
  • Ropecaster
    Tie down three small machines, such as Watchers or Striders.
  • Rattler
    Kill three human enemies using Metal Bolts. The Rattler is kind of like a shotgun, so just get good and close and let rip.
  • Carja Tripcaster
    Trip three machines with Blast Wires. Easily completed during the Nora Hunting Grounds challenge.
  • Carja Sling
    Shock three machines weak to shock damage with Shock Bombs. Scrappers are a good bet.
  • Carja Sharpshot Bow
    Remove three machine parts using Tearblast Arrows. These must be components like canisters or weapons, not armour plates, so aim precisely. Focus will identify valid targets, but just because you can see it doesn’t mean you can hit it from every angle. Grazers are good targets.
  • Carja Ropecaster
    Tie down three medium-sized machines. Sawtooths, Bellowbacks and Shell-Walkers count. Easiest if you can find one on its own. Tie the same one down three times if you like; just make sure it is completely free before you start again.
  • Carja Blast Sling
    Attach three Sticky Bombs to machines. Very easy from stealth, or find something you can’t miss because it’s enormous.
  • Carja Rattler
    Shock three machines weak to shock damage using Shock Bolts. Longlegs are easiest for this, as Stalkers are more annoying to fight.
  • Carja War Bow
    Shoot Freeze Containers using Freeze Arrows. There are several machines with Freeze Canisters but Lancehorns are far and away the easiest targets; like Grazers, they have a stack of canisters on their backs you can hit with ease from behind them.
  • Shadow Hunter Bow
    Shoot ten plates from machines. This is kind of a pain and easier if you can find an isolated large machine like a Ravager, nullify its ranged attacks with Tearblast Arrows, and then sit up high on a rock where it can’t reach you. Armour plates are pale coloured and when you knock them off the creature appears darker, so target accordingly. You’ll probably need to repeat this a few times to get ten plates. And then you’ll never use this ammo again, probably.
  • Shadow Tripcaster
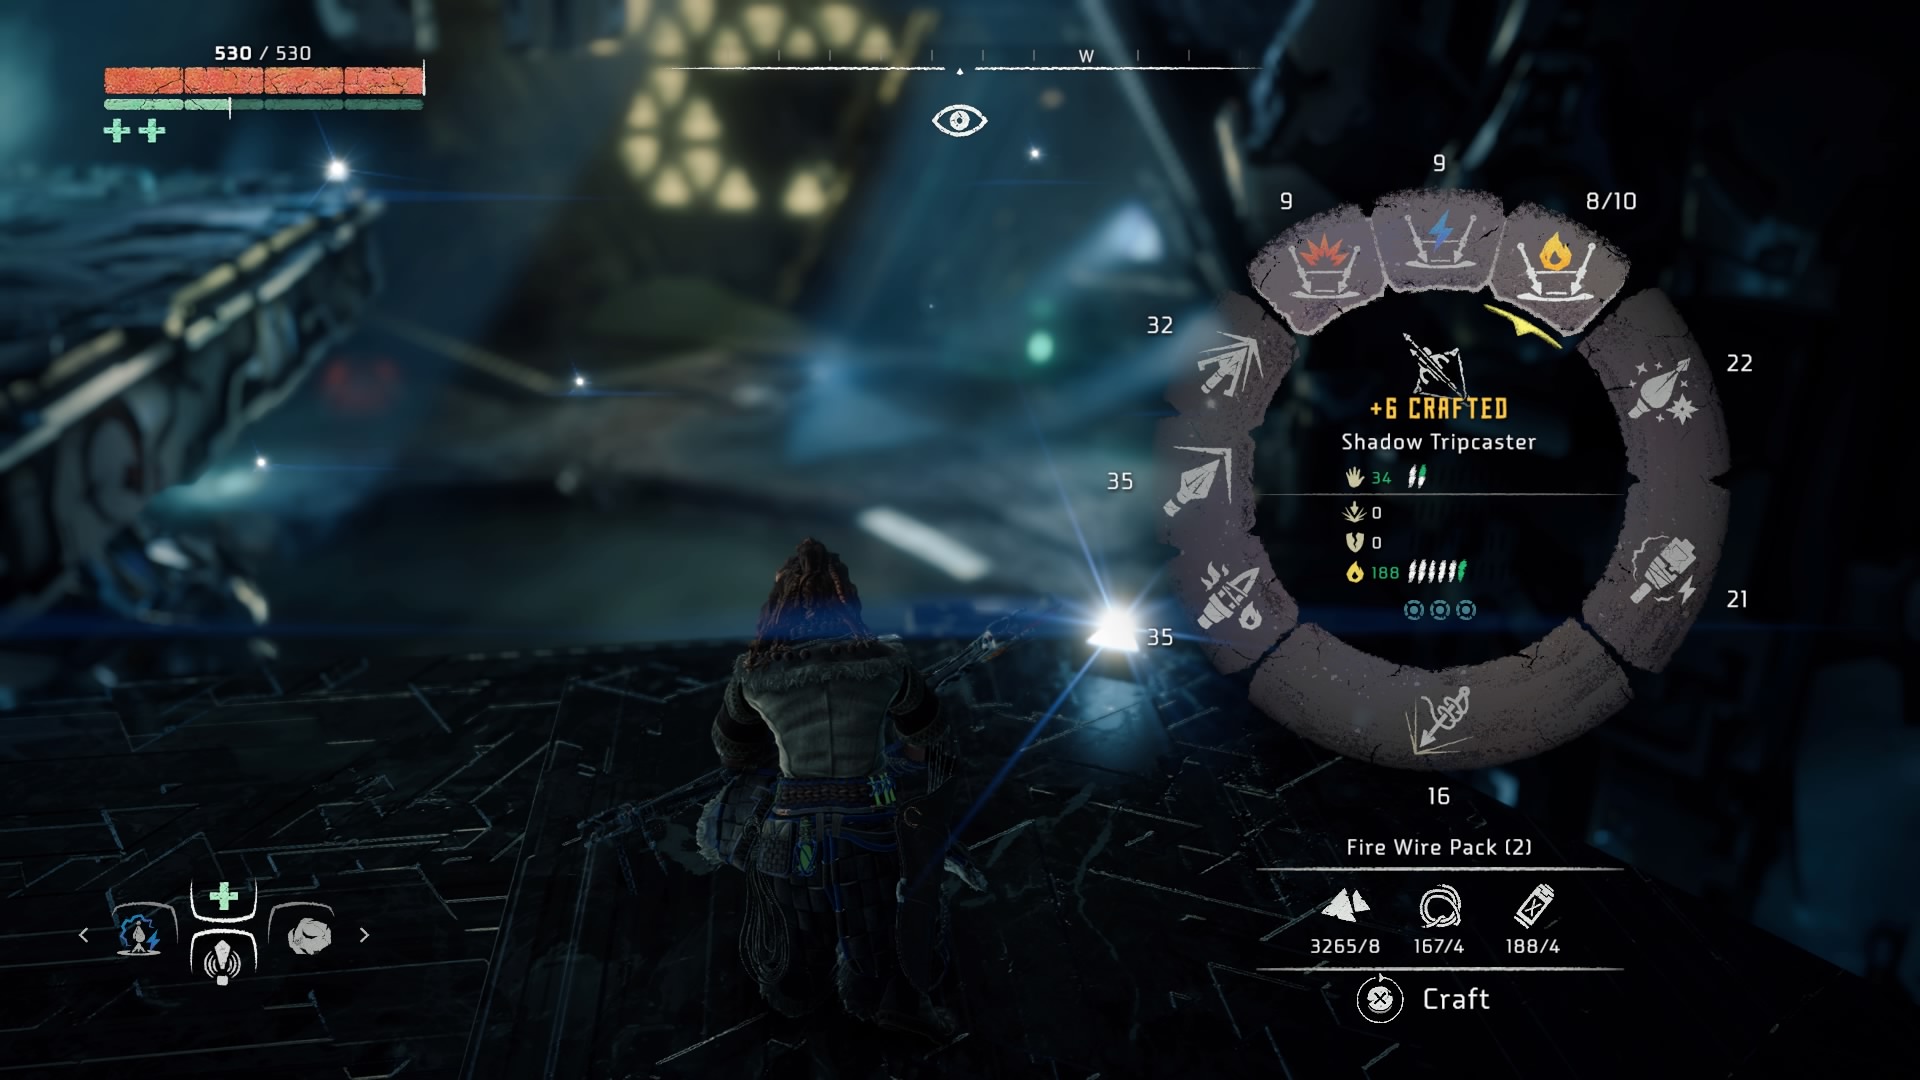
    Trip three machines with Fire Wires. No special requirements, so very easy.
  • Shadow War Bow
    Enrage three machines with corruption arrows. If you don’t have the Triple Shot skill, find some Watchers or Striders to knock this one over quickly. The more powerful machines will take several shots to corrupt, and since corruption doesn’t make the target friendly to you, you don’t want to break stealth doing this.
  • Shadow Blast Sling
    Kill three machines with Proximity Bombs. The bombs will one-hit kill weaker enemies, but you’ll have to weaken more powerful ones first. Try laying a line of bombs around you then blowing up a canister on something that will charge you in retaliation.
  • Shadow Ropecaster
    Tie down three large machines. Large machines include Stormbirds, Thunderjaws and Rockcrushers. Thunderjaw is easiest to hit; take out any other nearby machines first and, if you’re really struggling, knock off all the Thunderjaw’s weapons so you’re relatively safe from attack as you tie it down repeatedly.
  • Tearblaster
    Remove 15 machine components. The Tearblaster is really easy to use as you only have to point it vaguely in the right direction. Make sure your target actually has some components left to knock off; armour plates do not count.
  • Shadow Sling
    Burn three machines vulnerable to fire using Fire Bombs. This must be a body vulnerability, not a canister or other component weakness. Sawtooth, Freeze Bellowback, Glinthawk, Corruptor, Ravager and Snapmaw all work.
  • Shadow Sharpshot Bow
    Shoot off elemental canisters using Harvest Arrows. Grazers and Lancehorns, or perhaps even Striders, are the easiest targets here.

Horizon Zero Dawn™_20170228172905

Open world Horizon Zero Dawn content

As well as the formal quests listed above, Horizon Zero Dawn has plenty of open world tomfoolery to keep you amused. Below you’ll find a check list of what you should see and do as you wander the map; overriding Tallnecks will reveal all of these locations, but as long as you go everywhere you shouldn’t miss anything.

Collectibles

See our Horizon Zero Dawn collectibles guide for vantages, metal flowers, ancient vessels and Banuk artifacts. Or just buy the maps found in the Special items section of any post-prologue merchant’s inventory.

Bandit Camps

Bandit camps are fortresses filled with human enemies. For best results, sneak in and disable the alarm first; that prevents reinforcements. Free prisoners for AI assistance. Prior to your first bandit camp in the sacred Lands, look for an NPC nearby. Nil proves to be an able companion throughout Horizon Zero dawn if you befriend him.

  • Devil’s Thirst
  • Hollow Fort
  • Two-Teeth
  • Gatelands
  • Shattered Kiln
  • Blackwing Snag

Tallnecks

Tallnecks are to Horizon Zero Dawn what towers are to Assassin’s Creed and Far Cry – but they’re only a few of them, thankfully. Your goal is always to battle or sneak through nearby machines so you can reach a platform along the Tallneck’s patrol route high enough to allow you to jump onto its back. From there it’s an easy climb to the head to fill out nearby map icons.

  • Devil’s Thirst
  • Copper Deeps
  • Sun-Steps
  • Spearshafts
  • Rustwash

Corrupted Zones

There are 11 corrupted zones on the map. They don’t have names, but they’re hard to miss. Tallnecks will reveal them on the map.

Horizon Zero Dawn guide: power cell locations for the Ancient Armor side quest

$
0
0

Horizon Zero Dawn offers diligent treasure hunters a chance at the best armour in the game. Here’s how to get it – and where to find all the power cells you’ll need on the way.

Horizon Zero Dawn™_20170228164542

Horizon Zero Dawn includes a side quest called Ancient Armor, which is rated level 25 but unlocks in the starting zone if you stumble across it early enough. As the name suggests, the reward is a suit of pre-apocalypse armour. It’s the best outfit in Horizon Zero Dawn by a wide margin, but you need to find a number of power cells to find it. (That’s “energiezellen”, if you’re playing the German version and landed here anyway; hallo, by the way.)

It’s worth tracking down those power cells though. The Shield-Weaver Outfit can’t be modified, but it has admirable resistances in all categories, easily putting it on a level with anything you could cobble together in Horizon Zero Dawn. Best of all it will completely repel a huge amount of damage before needing to recharge. That means you can be hit and take zero damage, over and over again, provided you can scurry away for a few seconds between blows. It doesn’t look like total arse, either (looking at you, Silent Hunter sets) and even has a cool shimmering effect.

On the page below we’ll tell you exactly how to start the Ancient Armor side quest, where to find the power cells you need to complete it, and how to solve the puzzles between you and the best armour in Horizon Zero Dawn.

Some spoilers for Horizon Zero Dawn mission and dungeon names follow.

Find the Bunker ruins and hololocks

To trigger the Ancient Armor quest, you can find a power cell for the objective “find a use for the power cell”, or complete Horizon Zero Dawn’s prologue missions, so you can leave the Mother’s Embrace zone and venture into the wider Sacred Lands map to stumble across the main quest location.

In either case, you’ll want to exit Mother’s Embrace and head north along the main road, keeping an eye out for the rainbow-like ruins symbol on your radar and map. The location you’re looking for is Bunker, and it’s on the western side of this area, towards the mountainous border with Mother’s Embrace and the Carja Territories.

Descend into the Bunker dungeon (don’t miss the Metal Flower down here) and proceed to the end of the area to find a locked room housing the titular Ancient Armor. Facing inwards with your back to the dungeon entrance, look to the right to find one of the hololocks you’ll occasionally encounter in Horizon Zero Dawn.

This hololock requires two power cells before you can open it, and you can grab both before the end of the prologue or return for them later (we list all power cell locations further down the page; don’t worry).

Once you bypass this first hololock inside Bunker, you’ll find a second one stands between you and the ancient armor. You need three more power cells for this lock; unfortunately, the remaining power cells are found in dungeons you cannot access until you reach the associated critical path quest. Again, power cell locations are listed further down the page.

Hololock solutions and looting the Shield-Weaver Outfit

Once you have all five power cells, return to the Bunker dungeon and interact with the two darkened interfaces on the first door seal to completely power the hololock.

Turn the hololock dials so they match the times indicated on the nearby monitor. From left to right, you want the lock to point up, right, down, left and up again.

This grants you entry to the second seal. Again, put the power cells in the darkened hololock interfaces, then turn the holodeck dials to match the angles indicated on the display – from left to right: right, left, up, right and left.

With both sets of hololocks opened thanks to the energy of all five power cells, you’ll receive a treasure box. Check the treasure box section of your inventory and loot the new package to grab the Shield-Weaver Outfit.

Horizon Zero Dawn™_20170228164402

Horizon Zero Dawn power cell locations – how to find them all

You’ll need to progress along Horizon Zero Dawn’s critical path quite a way in order to collect all the power cells for the Ancient Armor sidequest. It’s worth it for the Shield-Weaver outfit, though; it will stand you in good stead for the tougher side quests and endgame.

  • Ruins power cell – any time after Aloy reaches adulthood
    The first power cell you can collect in Horizon Zero Dawn is in the Ruins dungeon in Mother’s Embrace (the starting area). This is the dungeon Aloy explored as a child during the opening tutorials. Return to Ruins as an adult and look for areas where stalactites and stalagmites form a barrier; smash these with your spear to loot the rooms beyond. One contains a power cell. Don’t miss the Metal Flower down here while you’re at it.
  • All-Mother power cell – during or after main quest The Womb of the Mountain
    The second power cell can be found while still in Horizon Zero Dawn’s opening prologue. When Aloy awakens in All-Mother, search the chambers around the angled corridor (check the map) to find a power cell near the crawlspace tunnel. You can return here later if you miss it; if you fast travel in the door may be closed, but you can open it again by fast travelling to a more distant location and walking or riding back.
  • Maker’s End power cell – during or after main quest Maker’s End
    The third power cell we found in Horizon Zero Dawn is at the very top of the tower in Maker’s End, which you explore during the critical path quest of the same name. Once you reach the conference room which is the final objective of this dungeon, jump up above the lift shaft and follow the climbing path to find the power cell at the absolute highest level.
  • The Grave-Hoard power cell – during or after main quest The Grave-Hoard
    A fourth Power Cell can be found in the ruin called The Grave-Hoard, which is first accessible during the critical path quest of the same name. Poke into side rooms to loot it; it’s not very well hidden.
  • GAIA Prime power cell – during or after the main quest The Mountain that Fell
    The final power cell is in GAIA Prime, which you can’t access till right at the very end of the main quest. This is best done the first time you visit the dungeon and checkpointing is active. Go right through to the room where you view a hologram and collect the quest item, then look for the zipline back to the start but don’t take it. Instead go back outside towards the stairs and examine the ledges on the abyss side for the start of a climbing path leading down. Once on the lower level, follow the purple lights to find the fifth power cell. Walk down in the direction of travel of the zip line to find the path back to the quest objective.

Horizon Zero Dawn™_20170228164648

That should be everything you need to track down all the power cells, unlock the Bunker seals and grab Shield-Weaver, the best outfit in Horizon Zero Dawn. If you do need any further help with the Ancient Armor side quest, just let us know.

Horizon Zero Dawn guide: power cells, best weapons, Cauldron locations, All Allies Joined – if you want it, we got it

$
0
0

Horizon Zero Dawn is a big game. Go at it systematically with our guide to quests, side-quests, collectibles, the best equipment and more.

horizon_zero_dawn_review_3

Horizon Zero Dawn is best enjoyed without spoilers, so you won’t find any here; this guide hub links out to all the resources you’ll need to to track down that 100% completion stat, without revealing the mysteries of the world.

Built by the team behind the Killzone shooters, Horizon Zero Dawn is a single-player adventure set in a “post-post-apocalyptic” word where humanity ekes out a living in the shattered remnants of a long-forgotten technological past. Their only rivals? The terrifying machines that roam the landscape, intent on their own mysterious purposes.

Our hero, Aloy, must use all the skills of a Nora warrior – and many more unique to our red-haired heroine – as she confronts a growing threat. With three kinds of bow, two slings and a host of other weaponry, Horizon Zero Dawn hands players a crowded toolbox with which to dismantle their towering foes. Don’t worry, we’ll cover all that, too.

Whether you’re looking for the best armour, the best weapons, some tricky collectibles, or just some advice on what to do when in Horizon Zero Dawn – we have you covered with this guide.

Now: get out there and slay some robo-dinos.

  • Everything you need to know to grab all the collectibles

    Vantages, Banuk artifacts, ancient vessels and metal flowers: all four of Horizon Zero Dawn’s collectibles are laid bare. It’s not always clear how and where you can find these babies, even if you have the map. We explain each one and guide you to some of the trickier examples.

  • Tips: easy XP, skill points, crafting, unlock weapons and get the best gear

    New to the game? A bit baffled? Wondering why things don’t die when you shoot them? Start with this collection of Horizon Zero Dawn tips and tricks. There are tens of hours of content ahead of you; don’t spend nine of them unaware that you can make health potions on the fly, or skipping over the best skills.

  • How to find the Death Stranding Easter egg items

    Hideo Kojima likes the Horizon Zero Dawn engine so much he’s using it for Death Stranding. Check out these neat little nods to his new game, and chase them down yourself for the glow of a job well done. That will be your most meaningful reward.

Mass Effect Andromeda guide: Meridian – The Way Home, Khi Tasira

$
0
0

It’s time to take Meridian.

mass_effect_andromeda_guide_meridian_1

Now that you’ve settled the Krogan paradise of Elaaden and taken The Journey to Meridian, Mass Effect Andromeda‘s main quest priority operations are drawing to a rapid conclusion: the time has come to try to take Meridian and, if necessary, take out the Archon. Things are heating up!

Find more tips, tricks and explanations in our Mass Effect Andromeda guide and walkthrough.

The Point of No Return

The kick-off for this mission is a little different to any other mission in the game – and that’s because we’re rapidly heading towards the end of the game. Things are suddenly a little different. While you’ll have found a slew of new quests unlocking alongside each new Priority Op, The Way Home triggers no such series of quests – and that’s because the game is getting ready to wrap itself up.

This is the point of no return, of sorts, and as a result you’ll want to try to tidy up any quests. We’ve listed all the side missions and tasks that unlock alongside each major mission on their walkthrough pages – you can use this as a checklist of sorts. You can check out all of the available quests via our guide hub, and you’ll find the most recent quests that unlocked on the pages for Hunting the Archon and The Journey to Meridian.

One nice thing to note, however, is that almost all the game’s quests will still be available to you after the credits roll in a post-game save. There is an exception, however: anything involving the Hyperion. Make sure you tidy off any quests marked as coming from the Hyperion in your quest log, for they won’t be available post-credits.

mass_effect_andromeda_g1

Optional Extras before hitting Meridian

Before you head to Meridian, there are some quests you should consider doing. These quests will have a significant impact on the finale of the game – so if you don’t do them things will be different and quite possibly a little worse.

Below, we explain the missions in question and why:

  • Missing Arks – Turian Ark: Lost but not Forgotten

    Tracking down the Turian Ark in this sub-quest will lead to you finally having a Turian Pathfinder on your side. The more pathfinders the better for this final assault.

  • Missing Arks – Cora Harper: Asari Ark

    Much as with the Turian Ark, following Cora’s loyalty mission won’t just make her loyal and unlock her rank six skills but will also one way or another mean you end up with an Asari pathfinder. Be sure to either hide the dirty secret or appoint a new pathfinder entirely if you want their help.

  • Know Your Enemy

    This quest line is all about a bit of dissent within the Kett hierarchy – not every Kett agrees with what the Archon is up to. Completing this quest might mean you have some inside help…

mass_effect_andromeda_suvi

Gather Scourge Data from the Galaxy Map

In order to track down Meridian, there’s a bit of busy work too. First off, chat to Suvi on the bridge of the Tempest. After some exposition you’re to use the Galaxy Map and collect data on the Scourge. Since you’ll be travelling around anyway this is an ideal time to tidy up missions, as mentioned above.

Once you’ve gathered the data you’re pointed to, use the terminal on the Tempest Bridge to analyse it. You’ll then be pointed back to Khi Tasira, the place we visited in the previous main mission, The Journey to Meridian.

This is where the true point of no return is, and the game will alert you of this fact. When you’re ready, head to Khi Tasira to kick off Mass Effect Andromeda’s finale.

mass_effect_andromeda_guide_meridian_4

Back on Khi Tasira – and the Hyperion

On Khi Tasira you’ll face a number of Remnant enemies – remember that these guys are synthetic, and so they’re vulnerable to electricity-based attacks such as Overload and other tech powers. Remember, however, that the load-out you pick will carry through with you right to the end of the game – and that’s going to involve a big boss encounter and some further encounters with the Kett. Pick a load-out and build that you think can handle both sides of things.

Battle your way through Khi Tasira – then you’re in for a bit of a surprise. We won’t spoil it.

Now you have to battle your way through the Ark Hyperion – the difference being that you don’t have much in the way of weaponry. Use your pistol and grenades carefully to take down the Kett – it’s only the Chosen, so you don’t have to worry too much about this compared to other encounters. As you progress, you’ll soon find much deadlier Kett, but the story gives you a way around it.

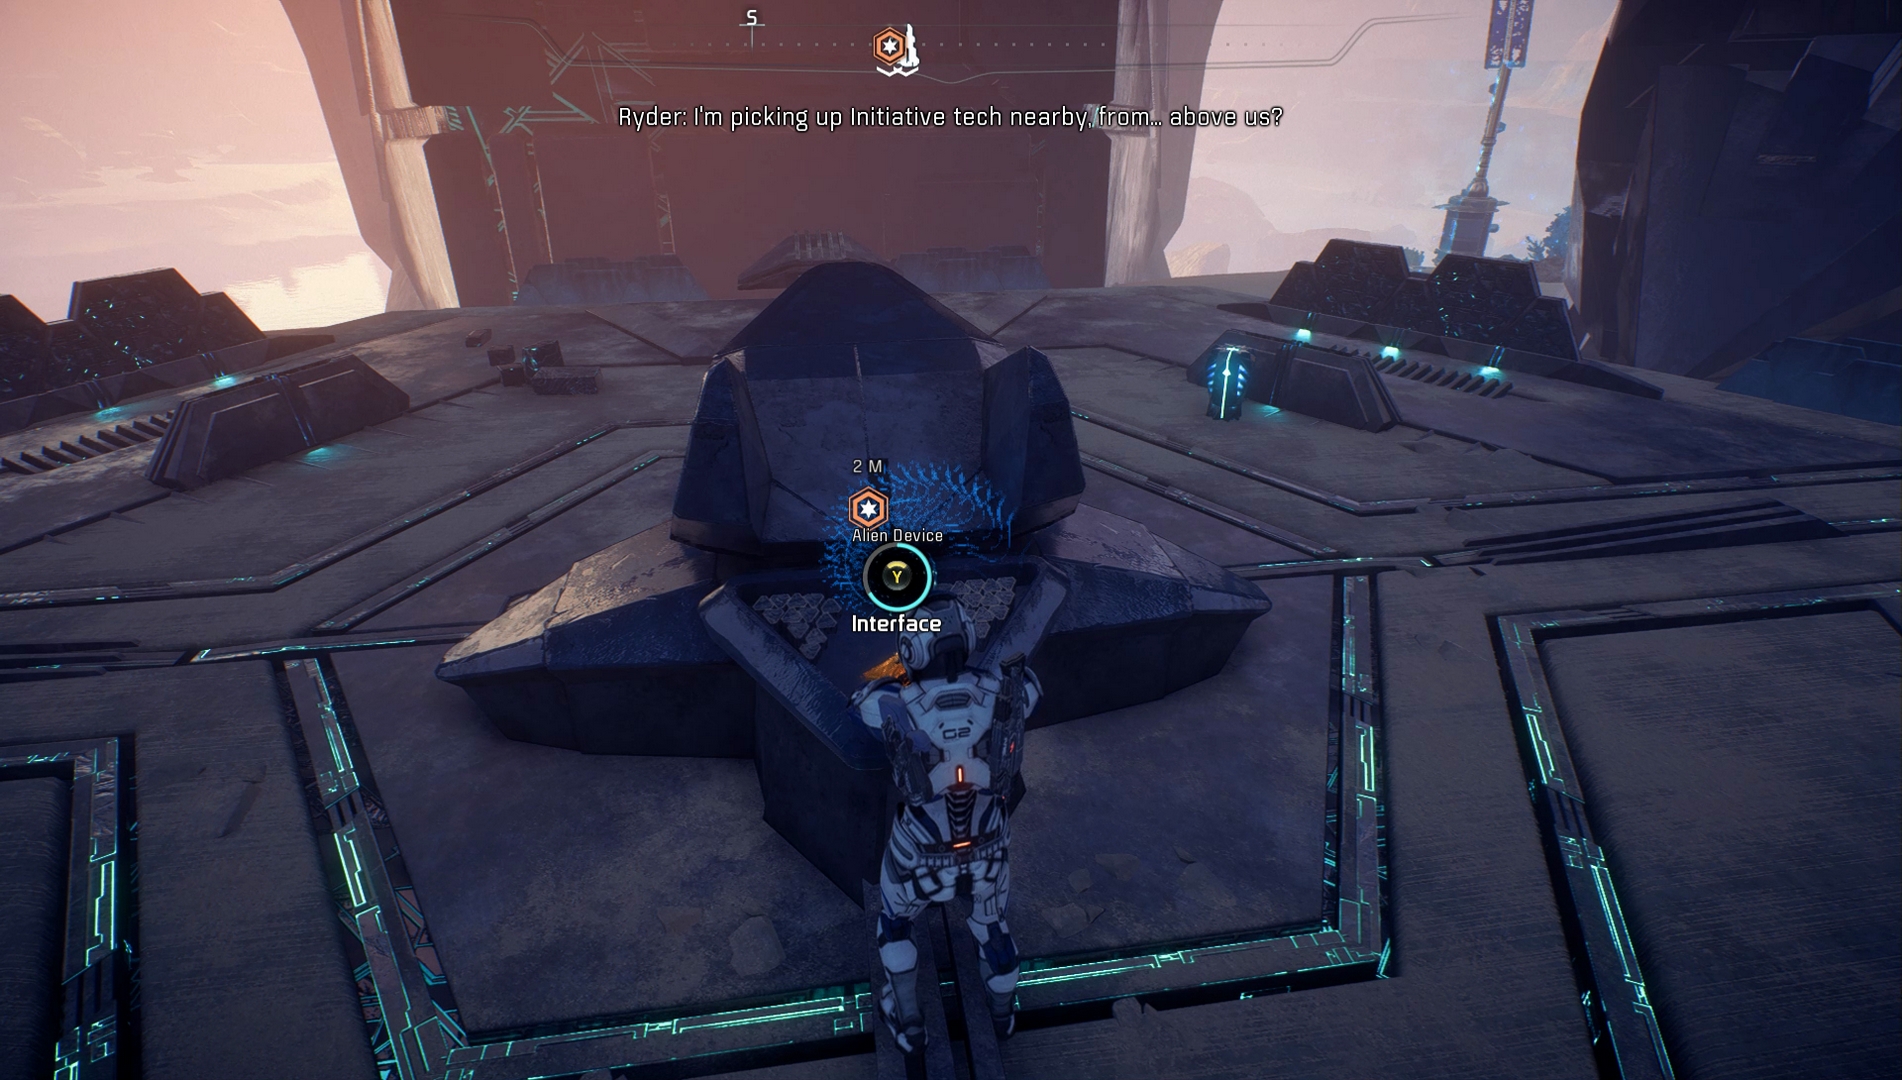
Get to the console indicated and use it. Some story unfolds… and then you’ll find yourself back aboard the Tempest.

mass_effect_andromeda_guide_meridian_3

The Final Battle for Meridian

On the Tempest things don’t stop for a breather, not really. This is a last chance to talk to your squad before the finale – in case, you know, anyone doesn’t make it. Or just to give them a pep talk – either way, consider taking the time to have a chat with each of them. While you’re back on the Tempest, this still counts as part of the mission, so you can’t save or fly anywhere else.

This is now a final assault. Here, your choices from throughout the game will come back to help or haunt you in the form of which friendly faces show up to help you – or which ones don’t. The Pathfinders, the Angaran Resistance – lots of people can help you depending on your decisions throughout the game, as detailed in the rest of our guide.

Fight your way through the waves of Kett enemies. Everybody is at this party – there’s Ascendant, Chosen, Anointed, Destined, the works. You’ll even face the occasional rare Exalted Krogan. We’ve published strategies on how to take down several of these tougher enemy types on our other pages.

You know how to take all these down from hours of battling Kett right across the Heleus Cluster – just employ everything you already learned here. Remember that you can order your squad to focus fire and ability use on a particular enemy if you need to take them down fast, and keep moving from cover to cover to keep yourself safe.

Don’t forget the basic combat setup either: slow-firing guns are better against armor, rapid fire is better against shields.

The fate of Captain Dunn

At a point in this final push Captain Dunn of the Hyperion will throw herself in harm’s way for the greater good. She will die unless you made some prescient decisions throughout the game: if there is a helpful Asari Pathfinder and if Avitus is the Turian Pathfinder, Captain Dunn will be saved.

The Final Boss – The Archon and the Architect

After Captain Dunn’s fate is decided you’ll have a series of more difficult battles including an Exalted Krogan and a Fiend at the same time(!), but again, your basic combat smarts will see you through this one. Clear out the Kett and push on, and then you’re going to be given a more specific task.

What you need to do is get to the position pointed out to you by your helpful ally and then hold your position there until the console you need becomes active. You’ll have to repeat this three times. That doesn’t sound so bad, right? Well… there’s a catch.

The catch is an architect. The good news is that if you’ve been fastidious about your side mission completion you will have already battled a few of these bad boys, though this battle is a little different since you have an additional objective to worry about. Still, our original architect strategies still very much apply.

Here are some basic tips:

  • Focus on the small remnant first – the smaller remnant such as assemblers and observers should be your initial priority, and once they’re down then turn your attention on the architect.
  • Make good use of cover – while much of Andromeda’s combat allows you to tackle things in a more mobile manner, you’ll want to make good use of cover against the architect – its guns are devastating.
  • Be ready to move away from grenade spam – the architect will use sticky grenades to flush you out of cover, but the UI marks them clearly. When it spits grenades out, make a move.
  • Be aware of your position – this is a simple one, but watch where you step – you need to be inside the markings the UI leaves on the floor in order for the hacking to progress. Hold the line!
  • When the head is exposed, attack! – attacking the head when your allies tell you to can leave the architect temporarily out of action, giving you vital time to regroup.

Once you interface with all three consoles you’ll be able to fully defeat the Architect and with it the Archon. Meridian is yours! We’ll leave what happens next for the game to explain. Or you could watch the video below.

Don’t worry, Mass Effect Andromeda continues after these scenes play out. You can explore the cluster at your leisure.

Destiny 2 – story, PC release, pre-order bonus, Collector’s and Limited Edition contents leaked – rumor

$
0
0

The Destiny 2 debut trailer won’t land for another three hours yet, but already the hype train is reaching Mach 5 or something close to it, thanks to a purported leak out of a retail store in Spain. Obviously, take everything you read in this post as a rumor until official word comes down from on high.

destiny_2

The retail leak not only divulged the contents of Destiny 2 Collector’s and Limited Editions, but the storyline and a look at the supposed PC game case.

According to the original post on Spanish site Universo Destiny, which has since been pulled, here’s the synopsis of the story in Destiny 2 pulled from the retail listing. Please note, it has been translated, so there will be grammatical errors (thanks, reddit):

“From the creators of Destiny, a highly acclaimed game, the extremely anticipated sequel is coming up. A first person action shooter that places you in an epic adventure through the Solar System.

“The Last City on Earth has fallen before an overwhelming invasive force under Ghaul, the towering commander of the Red Legion. Guardians are running out of power, and the few survivors have left.

“You will venture in mysterious, uncharted worlds from the Solar System to discover devastating weapons and combat abilities. In order to defeat the Red Legion and face Ghaul, you will need to gather the surviving heroes from the City and fight back together to claim back home.”

Much of this lines up with what was seen in the teaser earlier this week, and what was said to be unused concept art which surfaced in 2016.

The artwork from last year showed the Traveller and the Last City in flames – which was also shown in the Cayde-6 clip on Tuesday.

Contents of the Collector’s and Limited Editions were also outed, along with a Cayde-6 statue as a preorder bonus. It’ said the statue is exclusive to GAME in Spain, but as PvP Live points out the figure is also a limited pre-order bonus at GameStop.

The retailer will be given limited numbers of 100, it seems. The site also notes Cayde-6 is part of a Destiny line showed off by Bigshot Toys at New York Comic Con 2016.

It’s been reported previously all pre-orders of Destiny 2 will come with early access to the beta, and this was confirmed by the listing. Previous reports state the beta will land on PlayStation 4 first. A pre-order page on GameStop also states the same, as seen in this image.

Here’s the contents of the Collectors Edition and Limited Edition organized by MeisterLeder over on NeoGAF:

Collector’s Edition

  • Destiny 2 game
  • Expansions I and II including quests, coop activities, multiplayer content and tons of armor and gear
  • Legendary sword DLC
  • Legendary emote DLC
  • Cabal empire emblem DLC
  • “Frontier” physical bag you can carry around with a 15″ tablet pocket
  • “Frontier” kit including USBcharger with solar panel
  • A paracord
  • A solar rug
  • Limited edition steelbook
  • Collector’s edition cabal themed premium box, including a notebook, a map, and collectibles such as postcards and “pawns from the Empire”

Limited Edition

  • Destiny 2 base game
  • Expansions I and II
  • The DLC noted in the Collector’s Edition
  • The steelbook
  • The premium box and all the stuff inside

As far as the PC version is concerned, the only information provided was the box art, which is a sketchy screenshot of it taken from a monitor. It could easily have been photoshopped as it’s not clear as a bell. As you will see, it’s the same artwork on the poster which leaked last week.

destiny_2_pc_case_maybe_possibly_could_be

While we’re leaning toward all this being true, again, we can’t say it’s legitimate because neither Bungie nor Activision has revealed any information other than Destiny 2 is coming.

The debut trailer and more information on the game will drop at 10am PT/1pm ET/6pm UK. Stay tuned until then, we reckon.


This Injustice 2 video focuses on Supervillains Scarecrow, Captain Cold, others

$
0
0

Here’s a new Injustice 2 trailer for you, showing some of the Supervillains in the game, from Gorilla Grodd to Bane.

The Injustice 2 video takes a look at the fighting styles for some of the bad guys. You’ll also notice Captain Cold and Scarecrow in there, dishing out their own brand of pain.

Artwork for Captain Cold and Scarecrow is below.

injustice_2_captain_cold injustice_2_scarecrow

Injustice 2 will be released on PlayStation 4 and Xbox One May 16 in North America and May 19 in the UK.

Persona 5 DLC starts rolling out next week, here’s the release schedule and pricing

$
0
0

Persona 5 is almost here, and to get you even more excited than you are already, Atlus has provided information on the game’s upcoming DLC.

persona_5_1

Persona 5 is out next week, and is already a hit with critics. Our own Alex Donaldson even said it’s “the best Japanese RPG in over a decade.” Sounds like fans have a great game to look forward to, then, and there is plenty of DLC – both free and paid – to keep you busy.

Here’s the DLC release schedule and as well as pricing for each. We just took screencaps of it because the list is so organized:

p51

ps52

ps53

If you missed the fun Persona 5 Demon Lord Mara statue post from earlier, take a look at it here.

Persona 5 releases on April 4.

Destiny 2 releases September 8 and it’s coming to PC – here’s the reveal trailer and more information

$
0
0

Bungie has dropped the Destiny 2 reveal trailer along with some basic storyline details, retail and digital options, and confirmation of a PC release.

The video provides a look at the new story in Destiny 2 where the “last safe city on Earth” has fallen and is now occupied by a new enemy and his elite army, the Red Legion.

As a Guardian in Destiny 2, players will need to master new abilities and weapons to reunite the city’s forces to reclaim their home.

The video above, Rally the Troops, shows two of the Vanguard, which are leaders of the Guardians. In Destiny 2, players head off to new destinations around the solar system and while exploring, will find an “expansive amount of activities.”

Bungie said there will be plenty for solo, cooperative and competitive players to do in game.

The first hands-on gameplay reveal livestream will be broadcast on May 18.

Destiny 2 is now available for pre-order in standard, and Collector’s Edition as well as the Digital Deluxe and Limited Edition.

As and as previously reported, pre-ordering the game nets early access to the beta with dates to be announced, but it’s slated for sometime this summer.

destiny_2 (1) destiny_2 (2) destiny_2 (3) destiny_2 (4) destiny_2 (5) destiny_2 (6) destiny_2 (7) destiny_2 (8) destiny_2 (9) destiny_2 (10) destiny_2 (11) destiny_2 (12) destiny_2 (13) destiny_2_artwork

Destiny 2 Limited Edition($99.99)

  • Destiny 2 Base Game
  • Destiny 2 Expansion Pass: Get access to both Expansion I and Expansion II, offering brand new story missions, cooperative activities, competitive multiplayer, and a wealth of new weapons, armor, and gear.
  • Limited Edition SteelBook Case

Cabal-themed Collector’s Box, containing:

  • Booklet with secrets into the Cabal Empire
  • Cabal Schematic
  • Collectible Postcard Images
  • Cabal Military Pawns

Premium digital content:

  • Legendary Sword
  • Legendary Player Emote
  • Cabal Empire Themed Emblem

Destiny 2 Collector’s Edition($249.99)

  • Destiny 2 Base Game
  • Destiny 2 Expansion Pass: Get access to both Expansion I and Expansion II, offering brand new story missions, cooperative activities, competitive multiplayer, and a wealth of new weapons, armor, and gear.

Destiny 2 – Frontier Bag

  • Customizable bag that can be worn as a backpack or messenger bag
  • 15” Laptop/Tablet Sleeve with protective pocket slip

Frontier Kit, featuring:

  • Solar panel USB charger with built-in light
  • Paracord
  • Solar blanket

Limited Edition SteelBook Case:

  • Booklet with secrets into the Cabal Empire
  • Cabal Schematic
  • Collectible Postcard Images
  • Cabal Military Pawns

Premium digital content:

  • Legendary Sword
  • Legendary Player Emote
  • Cabal Empire Themed Emblem

Destiny 2 – Digital Deluxe Edition ($99.99)

  • Destiny 2 Base Game
  • Destiny 2 Expansion Pass: Get access to both Expansion I and Expansion II, offering brand new story missions, cooperative activities, competitive multiplayer, and a wealth of new weapons, armor, and gear.
  • Premium Digital Content:Legendary Sword, Legendary Player Emote, Cabal Empire Themed Emblem
destiny_2_hi_rez_artwork_characters (3) destiny_2_hi_rez_artwork_characters (2) destiny_2_hi_rez_artwork_characters (1)

The standard game with the Expansion Pass included will run you $89.99 while separately, the Expansion Pass will run you $40.

An Expansion pass will also be on offer, and will contain Expansion I and Expansion II, offering brand new story missions, cooperative activities, competitive multiplayer, and “a wealth” of new weapons, armor, and gear.

Looks like the information in the leak earlier today was spot on, even the PC boxart.

Destiny 2 releases worldwide on September 8 for PC, PS4 and Xbox One and as of press time, Bungie suggests a minimum of 68GB available hard drive storage will be required.

There will be additional, timed exclusive content on PlayStation 4. To play online, users will need a PlayStation Plus or Xbox Live Gold subscription.

Until Destiny 2 is released, current players can enjoy Age of Triumph in Destiny 1.

It’s the last live update to the game, and should provide players with plenty to do and accomplish in the meantime.

Destiny 2 – here’s a breakdown of the new enemies, locations and more seen in the trailer

$
0
0

Destiny 2 is the big news today, and if you missed some of the finer details shown in the reveal trailer, or any other information, we’ve got you covered.

In the video, Arekkz goes over everything seen in the Destiny 2 debut video with a fine-toothed comb. He breaks down what your seeing as far as Cabal enemies and the Vanguard are concerned, and touches upon the story elements.

He also recaps additional information not shown in the trailer, such as the various editions of the game, DLC, the beta, PC version, and more.

We told you about all of that in our main Destiny 2 reveal post, but if you prefer a condensed version, Arekkz has you covered and then some.

Today we were given a bit of back story on what’s to come, and the first look at gameplay will be revealed via a livestream on May 18.

The beta is slated for sometime this summer, and you can get in on it if you pre-order.

Destiny 2 will be released on PC, PS4 and Xbox One September 8.

Destiny’s had a little post-Age of Triumph hotfix, so Petra Venj’s class item spam is at an end

$
0
0

Destiny: Rise of Iron update fixes a few little foibles introduced with the Age of Triumph patch and event.

destiny_age_of_triumph_vault_of_glass_action (8)

A small Destiny update rolled out today, designed to counter a few bungs found after the release of Age of Triumph, the big free content update that went live this week.

There are a couple of very important changes, such as Hard Mode raids opening up even to those who haven’t done the normal versions, and fixes for some cheating tactics on the Bannerfall Crucible map. But since Destiny is all about loot, the one that stuck out for me is that Petra Venj will stop giving out so many class items. Behave yourself, Pet Revenge! Nobody needs another cloak. Give me a Ghost Shell, maybe.

Here are the patch notes for Detsiny hotfix 2.6.0.1, available right now on both PS4 and Xbox One.

    PVP
  • Fixed an issue related to the networking physics of color-changing advertisements in the center staircase of Skyline and in subway cars on Last Exit
  • Added invisible physics and kill volumes to prevent players from leaving the intended playable space to gain an advantage on Bannerfall
  • Fixed an issue with Ammo options in Elimination Private Matches
  • Adjusted spawning on Last Exit and Floating Gardens to reduce dangerous spawns
    Raids
  • Removed the requirements to complete normal mode of Raids before being able to access the hard mode reprisals
    Vendors
  • Fixed an issue with Petra granting too many Class items through rank-up packages
    General
  • Knuckles of Eao can now be moved into the Vault and transferred between characters

Mass Effect: Andromeda tips for brand new Pathfinders and N7 veterans alike

$
0
0
mass_effect_andromeda

Mass Effect: Andromeda Tips

The fact that Mass Effect: Andromeda is flawed has been pretty extensively covered now – from controversy about the game’s faces right on through to surprisingly low review scores the latest entry in Bioware’s sci-fi epic franchise has had a bit of a rough ride.

Underneath it all, however, there’s a heart of gold with a lot to love – but you have to dig a little to get to it. Hopefully patches, updates and other DLC are kind to this game.

If you’re planning to hop aboard the Ark Hyperion and head to the Andromeda Galaxy, there are some things you should know about the gameplay systems and mechanics of the latest Mass Effect. We’ve got a whole Mass Effect Andromeda guide and walkthrough, but maybe you don’t need all that. Maybe you just need an edge. Something that will not only make your life in a new and hostile galaxy a little easier, and smooth some of the rougher aspects of Andromeda’s execution.

Get wise. Be as prepared as an N7. Here are our top beginners’ tips:

mass_effect_andromeda_4k_screnshot_03

Forget the Eos side content – leave the planet as soon as possible and return later

Mass Effect Andromeda makes this really easy to miss, but once you finish the Vault on Eos you begin to clean the atmosphere of that deeply annoying radiation that’s covering vast parts of the map.

It doesn’t happen immediately – you’ll need to advance the critical mission path a little – but once it’s gone you’ll be able to explore almost the whole map without taking heavy environmental damage all the time.

Don’t bother fighting the radiation to track down all that Eos side content when you first arrive on the planet; the radiation is there to stop you doing it too early, not to provide a challenge. Some of the content is possible to complete, but you’re better off ignoring it to begin with.

There’ll be more Eos side content along again later on anyway, so don’t worry about it: you’re saving yourself a trip or three by waiting till it piles up a bit. Leave Eos. The game gets much better after those first story beats.

mass_effect_andromeda_ss3

Don’t worry about research and crafting just yet

You don’t really need to research and craft weapons and armour in Mass Effect Andromeda at all, but if you are going to do it, you may as well wait until later in the game, when you have a better idea of what you want – something to boost biotic powers, for example.

The reason for this is that crafting materials and research points are in relatively short supply, so if you’ve spent all your hard-earned currency unlocking a dozen different level one leg pieces, you’ll really struggle to get the points needed to get a higher level piece at the end of the game.

This goes especially for anything in the Milky Way subset of the research screen – those research points are by far the hardest to come by, but some of the most iconic Mass Effect gear is found in this section.

Most of the gear you see in the crafting menus is available in drops or from shops, anyway. The point of crafting is that you can apply augmentations when you craft them. A crafted, augmented level five weapon will be better than the same weapon acquired through other means, and you get to choose how.

Another reason to come back later is that the menus make a heck of a lot more sense later in the game when you’re not lost and overwhelmed. Leave crafting be for now – come back later.

mass_effect_andromeda_ss1

Spend your skill points wisely on complementary powers and abilities

An important aside to the previous point is to make sure you understand the skills page fully. Anything with a circular icon next to it is an active power – this means it’ll take up one of your three valuable power slots on any given profile and be executed with a button press.

Those with triangles next to them are passive abilities – constantly active buffs. To elaborate on with what we say above about min/maxing on a few good powers rather than a mixture, focus on three main active powers you’re going to use, and then plough all the rest of your points into passive abilities that’ll support your play-style.

Your active powers should also ideally complement each other – a good idea is to have two powers that ‘prime’ enemies for combo detonations and one power that’ll ‘detonate’ the combination – read the skill descriptions to see which is which.

Your plan then should be to prime enemies with one move and detonate them with the other for maximum damage.

mass_effect_andromeda_4k_screnshot_04

Commit to a small number of powers and profiles

The dream of Mass Effect Andromeda is being able to flip rapidly between builds (‘profiles’ here) as if they were multiplayer characters, rather than being locked to one path.

In reality, you do yourself a huge disservice by spreading yourself thin. It takes a lot of upgrade points to evolve a power from its base form to its far more powerful sixth level manifestation, and having two or three level six powers will be much more deadly than a dozen level two abilities.

Similarly, if you try to unlock every profile it’ll take ages to get any individual profile to a level where each of the bonuses makes a significant difference to you.

We recommend picking one of the straddling profiles, such as Vanguard or Sentinel, and building into two of the three types of powers (Combat, Tech, and Biotic) Pick three active powers total across your chosen two skill trees, and buff them right up to maximum, while spending spare points on passive abilities to complement your powers, as discussed in the slide above.

If you find you’ve cocked it up, there’s a respec station on the Tempest, inside the Med Bay on the lower floor.

mass_effect_andromeda_november_screenshots_1

Try new weapons before you sell or chuck the old ones

There are so, so many weapons in Mass Effect Andromeda, and they vary considerably, even within classes.

It’s not just a matter of differing weight, clip size and damage output – some of these weapons handle really differently from others in the same family.

For example, there’s one assault rifle take a few moments to prime after you pull the trigger, then fires a short burst of ammo before needing to be primed again. That’s not something you expect from the spray-and-pray assault rifle class, is it?

Since you can’t change your loadout mid-mission, you don’t want to be kicking off a boss battle with a heavily shielded enemy only to find out the weapon you’re carrying is about as useful as a feather duster for that purpose.

mass_effect_andromeda_ss2

Unwanted gear is often better dismantled than sold

While credits in Mass Effect: Andromeda aren’t exactly as abundant as in previous Mass Effect games, they’re actually still pretty plentiful thanks to all the “salvage” (junk) items you pick up on the way. These items don’t take up inventory space and are easily sold with one click at stores, though hardcore Mass Effect fans might want to read some of the item names and descriptions first for some fun nods and easter eggs.

Beyond this junk your actual equipment is probably worth holding onto rather than selling. Once you’ve used the previous tip to decide what to keep and what to get rid of, instead of selling the weapon consider going into your inventory menu and using the option to dismantle it.

Guns, armour and add-ons that are dismantled by you will give you extra resources that can then be used for crafting – and as we mentioned earlier, some crafting ingredients can be quite hard to come by. It’s worth picking absolutely everything up if only to dismantle it.

As a bonus, you can dismantle items mid-mission and the loot you get from doing so doesn’t take up inventory space – so this is a great way to free up some inventory mid-mission if you find your carrying space maxed out.

mass_effect_andromeda_4k_screens_3

Don’t forget weapon weight when picking gear

As you upgrade Ryder you’ll have the ability to carry more gear – up to four weapons and up to four types of consumable add-on. The temptation might be to load yourself up with weapons: but consider not doing that.

Mass Effect veterans will know this, but weight matters. Every weapon you equip brings with it a weight attrictute, and the heavier the gear you’re carrying the longer the recharge time on your non-weapon powers. The trade off is simple: if you want more powers, have less firepower. If you want more firepower, accept that your powers will be usable less frequently.

Generally speaking we wouldn’t advise overloading on weapons – powers are really what makes Mass Effect combat satisfying, so pick your weapons wisely. Don’t forget that certain weapon add-ons can increase or lower the weight, too.

mass_effect_andromeda_ces2017_shot_7

Don’t sleep on melee or consumables – they’re amazing, so use them

One major addition in Andromeda is the actual melee weapon slot which allows you to equip proper melee weapons. You start out with an omni-tool, but don’t ignore potentially upgrading this section of your inventory. You’ll find new melee weapons as drops and also be able to craft them, and they range from more powerful omni-tools through elementally-infused swords, hammers and others besides.

I found the Asari Sword to be one of the best weapons in the game, for instance. There are plenty of proper melee weapons – for a biotic class it’s an absolutely amazing, devastating last resort. Basically, melee is well worth your time, especially with profiles that encourage you to get up close and personal. The Vanguard profile features massive melee bonuses at high levels – mine is currently at 40% – which can make these weapons even more deadly.

Consumables replace a lot of classic Mass Effect skills and make them usable across all classes – here’s where you’ll find disruptor, cryo and inferno ammo, plus other helpful bonuses including ways to quickly boost your health and shields back to max if you’re in a really bad spot or ways to bolster your ability to survive some of the game’s environmental hazards. These don’t impact your weight, so take as many as you can, unlock additional slots via the AVP interface on the Tempest and use them often – they can quickly turn the tide on a rough battle.

mass_effect_andromeda

Carry something that can take down shields

Shields are a literal lifesaver for you and your squad in Mass Effect Andromeda, but they’re a major pain when the enemy uses them. Just like you, enemies can recharge their shields, and they can and will run off and hide to do so.

Many otherwise powerful abilities have little effect on shields unless you evolve them for that purpose – especially those designed for battlefield control like pull and singularity – so you’ll want some way to get those shields down, and fast.

There are abilities specifically tailored to take down shields, so you may want to switch profiles when facing particularly tough shielded baddies, but in general a rapid fire weapon like an SMG or an assault rifle is your first port of call.

For ultimate devastation against smugly shielded baddies, purchase the relatively cheap disruptor ammo consumable. It eats them alive.

Drop the shield, then switch to a heavier weapon for the kill. Set shielded enemies on fire or apply other damage over time effects to prevent them regenerating shields.

mass_effect_andromeda_ces2017_shot_5

… and don’t forget something to counter armour

Armour is less of a pain in Andromeda than shields, but they’re still pretty damn strong. Armour is represented in-game by a health bar that’s yellow instead of health’s red or the blue of shielded enemies.

Armour is the opposite of shields – many of the things that are effective against shields aren’t against armour and the inverse. For the maximum impact against armour, use slow-firing weapons such as shotguns. Fire-based abilities such as the flamethrower also do well.

Once again, consumables are your pal here if all else fails – both cryo and incendiary ammo are great for rapidly chewing through those annoyingly persistent yellow bars. Apparently they’ve never heard of insulation and fire-proofing in the Heleus cluster.

mass_effect_andromeda_ss4

Combat is now more about movement than ever

The original Mass Effect trilogy became more and more of a cover-based shooter as time went on, and though Mass Effect: Andromeda features a cover mechanic, your general approach to combat should be much more based on movement and momentum – so get used to that.

Cover here isn’t an ‘active’ system where you press a button to hunker down against something, but is instead dynamic. As soon as you get within cover range of an object Ryder will naturally hunker down, and aiming around the cover and blindfire all work as you’d expect from this position. It feels a little weird for those of used to the old way, but you’ll get used to it. Health, shields and biotic barriers recover more quickly when you’re in cover, so your main use for cover is when your shields are down and you’re in danger.

Other than that you should be prepared to move, and often. The new jump jet, hover and dash moves are all major changes to the Mass Effect formula, giving you a ton of movement that was previously impossible. In an ideal world you should be spending fights constantly on the move, using dashes to kite around enemy attacks and flank dangerous foes. Don’t forget that several skills aid with movement or can help with shield restoration without the need for cover, so invest in things that cover your play-style properly.

mass_effect_andromeda_g2

Take a tour of the Tempest and the Nexus after major story beats

This is old news for Mass Effect veterans but if this is your first go-round with a BioWare RPG, make sure you check in with important NPCs after you complete a major mission or unlock a new planet.

Many squadmate conversations are locked to story progress,so if you want to unlock those loyalty missions or advance a romance, you need to check in regularly. Sometimes an email or PA alert on the Tempest will flag a new development, but not always – so be sure to visit with each member of your crew between missions. Nobody’s gonna bang you if you forget to talk to them.

You should also head back to the Nexus and stroll around the major areas – the Docking Bay, Operations, and perhaps even the Hyperion areas. Even if you think you’ve totally explored an area, new side quests pop up all the time, and you can save a lot of time by hoovering them all up at once and getting them done on your first visit rather than having to duck back two or three times as you clear your quest journal later in the game.

mass_effect_andromeda_4k_screnshot_24

Upgrade the Nomad and learn to use it properly

The Nomad has a few more tricks up its sleeve than the good old Nomad, although it is still possible to wedge it in crevices or get stuck on slopes over hazards if you’re very careless.

If you find the Nomad tiresome (or love it but want it to be even better), make sure you develop upgrades at the research centre – as well as the initial selection, you can pick up a stack of blueprints by speaking to Angaran engineer NPCs in the rebel base as you push through the main quest. The moset useful upgrades improveboost and six wheel drive mode, give you the option to switch off traction mode, and provide a brief shield whenever you exit the vehicle.

To take advantage of the Nomad’s expanded capabilities, learn how to switch between general and six wheel mode, how to switch traction control on and off, and how to use jump and boost; check the control screen for details on your platform’s bindings. You can even turn the headlights on and off, which is less useful when you’re climbing mountains but a pretty cute touch.

Oh, and always keep an an eye out for Nomad upgrades whenever you find a new general goods shop. As well as those we’ve discussed above, you can find cool new paintjobs – including Alex’s personal favourite, the Garrus-themed Archangel.

Wait, here’s one last thing: you can extract to the Tempest in orbit directly from the Nomad: just hold Triangle on PS4, Y on Xbox One, and T on PC. Pure magic.

mass_effect_andromeda_guide6

Make use of Strike Teams and Cry Pod perks for free stuff

Don’t sleep on a couple of the most poorly-communicated systems in Mass Effect Andromeda. While you’re off saving the galaxy – cluster, whatever – you could also be passively earning fat loot.

There are two parts to this. The first is Strike Teams. Open up the APEX terminal in the Tempest central hub and send your team on a bronze tier mission, then come back in a couple of hours, debrief, and tab to the rewards section to collect your loot. Easy! When your team levels up enough you can send them on harder and more lucrative missions, and after a while you’ll be able to afford a second team – right up to six squads. You can even send them on the multiplayer missions rather than go yourself. You have to be online to use the Strike Team system, though.

The other passive loot system is AVP Cryo Pod Perks. We’ve got a whole guide to farming AVP and the best Cryo Pod perks, but basically, as your game completion statistic rises, you’ll unlock various perks. Some of these will generate credits, research points, and crafting materials at regular intervals – free loot, forever.

mass_effect_andromeda_guide_meridian4

Leave side content until endgame

If you’re an RPG veteran, and especially if this isn’t your first BioWare rodeo, you probably tend to run around new hubs grabbing all the side quests, and then rush out and do them all before the next critical path story beat. Normally we’d applause this approach, but in Mass Effect Andromeda, it’s more trouble than it’s worth.

The thing is, Andromeda has so many minor quests on the books, and they’re doled out in so many little batches, that doing them as they crop up means revisiting the same areas over and over again. It’s a lot of time on loading screens, and you gain absolutely nothing by doing it the more laborious way rather than efficiently knocking off almost everything in an area off all at once after it unlocks towards the end of the game.

In fact, there’s some evidence Mass Effect Andromeda was designed for players to get everything done just before the point of no return; certainly all the NPCs struggle to keep track of your activities, and you can actually ever so slightly spoil some content for yourself by triggering scenes, emails and dialogue too early.

Save it all up for later in the game. Get everything done whenever the game gives you one of those “embark on a mission” prompts during a priority op, and you’ll be fine.

Mass Effect Andromeda romance guide: from casual banging to winning hearts

$
0
0

Mass Effect Andromeda: romance is in the air tonight. And it’s always night in space. Spoilers ahead.

mass-effect-andromeda

Mass Effect Andromeda ha several romance options available for both male and female Ryder. Each of these relationships offers a unique spin on the friendship scenes you’ll otherwise see towards the end of the game if you’re pursued loyalty and side quests with your squad mates, crew and NPCs.

And yes, some of a href=”https://www.vg247.com/2017/03/22/mass-effect-andromeda-all-romance-scenes-for-male-and-female-ryder/”>the final romance scenes in Mass Effect Andromeda are pretty steamy. Unfortunately, your questions about alien genitals will not be answered. Lotta butts though.

But even if the famous banging isn’t your thing, the romances in Mass Effect Andromeda range from sweet flirtations to friends with benefits to tender committed relationships, so you’ll have a fine time mashing the flirt button.

You can juggle multiple relationships, up to a point, as you navigate the tangled world of flirtations, friends with benefits, side pieces and full relationships detailed below. On the other hand, if you decide to pursue a full relationship you will lock yourself out of other full relationship lines, as these characters don’t seem to like to share – so make sure you’re ready to commit if a character asks you to go exclusive. Once you commit to a relationship, flirting with other characters no longer progresses their relationships, and you’ll get the “friend” version of their final scenes.

Although there are some exceptions (described below), in general, Mass Effect Andromeda romances progress in the same way. You need to flirt a minimum of three times with your intended and then complete all their loyalty missions and side quests. Have a few more conversations with them, and they’ll likely bring up the possibility of committing. It’s an ovious yes no moment, with Ryder having to answer something like “I want to be with you” or “sorry, I’m just playing”.

If you’d like to see every romance in Mass Effect Andromeda, our hot tip is to make a save before embarking on crew missions or speaking to them after they email asking to meet. These are the most likely instances for a commitment point. If you simply ignore those quests and scenes until right before the final mission’s point of no return (when it says “embark on this mission”) you can have every romance right on the brink, then split off side saves to see everything.

Less talk, more action: while we’ve divided the information below by the character’s own romantic preferences, we’ll start with a handy summary of the options available to each Ryder twin.

Find more tips, tricks and explanations in our Mass Effect Andromeda guide and walkthrough.

    Male Ryder
  • Cora
  • Peebee
  • Vetra
  • Avela Kjar
  • Gil
  • Reyes Vidal
  • Keri (fling only)
    Female Ryder
  • Liam
  • Jaal
  • Peebee
  • Vetra
  • Suvi
  • Reyes Vidal
  • Keri (fling only)

Read on to discover how to initiate Mass Effect Andromeda’s romances, how to advance them, when you’ll reach the point of no return, and how they cancel each other out.

Male Ryder exclusive romance options

mass_effect_andromeda_g2

Cora

Breaking the hearts of lesbians everywhere, Cora is straight as an arrow; she even turned down an Asari once, even though they’re not technically female. This good news for dude Ryders, though, as she’s all about that … whatever it is people see in him. Begin your assault on Cora’s heart once you have access to the Tempest and leave the Nexus for the first time; you can find her in the tech lab or the cargo bay.

To win Cora’s heart, you’ll need to flirt with her regularly throughout the game, until her loyalty mission unlocks. This is a multi-step quest that takes place over several missions and requires critical path progress to complete. It comes to a head when you track down the lost Asari ark.

Keep on flirting and you’ll cement the relationship with a kiss, and enjoy a couple of other exclusive romance scenes before Ryder and Cora make a very steamy first contact.

Commitment point: After flirting with Cora three times, complete her loyalty mission. Debrief with her, then leave the Tempest and return for a heart-to-heart conversation.

mass_effect_andromeda_gil

Gil

Gil is open about his interest in a male Ryder, and also open about what he wants. Flirt with him regularly and you’ll soon find yourself with the option to pursue a more than friendly relationship. You can get the ball rolling as soon as you have access to the Tempest and have left the Nexus for the first time; talk to him in the engineering section.

Continue to pursue the affair and eventually Gil will invite you to spend some time together on Prodromos, and discuss whether your casual banging has the potential to be something more.

Although Gil’s romance is light on scenes and interactions, you know you’ll always have a willing poker buddy.

Commitment point: After three flirtations and completing Hunting the Archon, Gil will email you about meeting on Prodromos, where you can declare your intentions.

mass_effect_andromeda_romance_guide_avela_kjar

Avela Kjar

An Angaran historian Ryder meets on Aya, Avela enjoys flirting and will even mash space faces with you on two occasions if you determinedly turn on the charm every time you complete one of her side quests. It’s a weird sort of romance – there’s no commitment conversation or steamy love scene, and we’re not sure it blocks you from other relationships. and You’ll need to complete the secondary quests Recovering the Past and Forgotten History to advance the romance, which culminates after you set out on your final critical path mission and receive an email from your beloved.

Female Ryder exclusive romance options

mass_effect_andromeda

Liam

Liam is kind of the “default” romance option for a female Ryder, as he’s the first of the squad mates to offer flirting opportunities. His loyalty mission is available relatively early on, and provides plenty more opportunities to indicate your interest. You can even miss a few and still maintain his interest. Begin your flirtation after you gain access to the Tempest and leave the Nexus for the first time; he generally hangs out in a room off the cargo bay.

You can pursue Liam without fear of closing off other romance options right up until after his loyalty mission, so if you’d care to have a quick pash onboard the Tempest, go for it.

Once Liam’s loyalty mission is done, you have the option to lock in a full relationship or let him down gently; when the dust settles on that adventure, the cheerful crisis specialist is yours for the taking. Continue to enjoy his company over several scenes and cement the deal after you visit Eos together in response to an attack.

Commitment point: After completing Liam’s loyalty mission he’ll ask you to meet him at Podromos. This is where you’ll have to make up your mind for good.

mass_effect_andromeda_jaal_jfc_is_it_hot_in_here_or_is_it_just_you

Jaal

Although the Angaran people display their emotions openly, they don’t necessarily act on them, and Jaal’s romance takes time to lock in. Keep flirting wqth him, but look out for the “couple” option that replaces the usual heart-shaped “flirt” one. Remember Angarans value honesty and emotional openness, so don’t be shy in declaring your intentions. You can start flirting once Jaal joins the squad; look for him in a room off the central research station area.

Jaal’s loyalty mission is required to commit to the relationship, and like Cora’s, it plays out over several missions and is reliant on main quest progress. Once that’s done, you’ll need to keep flirting until the main quest ramps up to its conclusion in order to fully seal the deal on a later visit to Aya.

Before you make your mind up on romancing Jaal, we recommend completing a small quest Liam sets you to craft a special requisition. Complete the crafting assignment and then visit Liam in the cargo hold to witness a conversation between Liam and Jaal offering, uh, revelations on them both. It’s always good to window shop before you get out your credit card.

Commitment point: If you’ve been flirting with Jaal and have completed his loyalty mission, he’ll email you about going to Hvarl. Put him in your squad and follow through for a chance to talk about your relationship.

mass_effect_andromeda_suvi

Suvi

Scottish accents, amirite? Suvi is a full romance option and pretty easy to complete as long as you’ve turned up in the correct gender. Of all the romance options, she’s the one a female Ryder finds the most intimidating, regularly babbling like a fool. It’s good fun. Suvi sits opposite Kallo on the bridge, so she’s always handy when you’re in the mood to flirt.

To romance Suvi, just flirt with her whenever the option arises: you don’t need to agree with her opinions in order to hold her interest, since she has a mature attitude to debate.

Keep an eye on your email and eventually you’ll receive a missive which invites you to kick off the full romance. You know what to do – or we certainly hope you do.

Commitment point: Flirt with Suvi, then talk to her on the Tempest after completing Hunting the Archon if you’ve decided she’s the one for you.

Male or Female Ryder romance options

mass_effect_andromeda_peebee

Peebee

Peebee is an Asari, and since Asari are mono-gendered and reproduce via a slightly scary form of mind meld, they don’t seem to care what you’ve got in your pants. The most enlightened race in the galaxy, indeed. After you recruit Peebee on Eos, she sets up camp out in the escape pod room off the bridge, but after your first conversation she is usually found in the cargo hold.

Coming out of what seems to have been a pretty bad relationship, Peebee is initially reluctant to commit to anything beyond flirting – which she indulges in freely. If you show interest, the turning point comes after you complete a couple of her personal missions – retrieving some rem-tech, and visiting her apartment on the Nexus.

When Peebee opens negotiations, you have two options: you can opt for a casual, NSA arrangement allowing you to discreetly indulge in friends-with-benefits whenever you fancy it. If you already know you’d like more from the carefree Asari, you can to hit the brakes, and let her know you want more than a quick bang. Update: Don’t worry! We were wrong! You can have a FWB relationship with Pebee and still have a full relationship.

Commitment point: Flirt with Peebee a few times to trigger the friends-with-benefit conversation, and either agree to a no strings relationship or tell her you want strings. Then complete her loyalty mission and debrief with ehr. Leave the Tempest and return for a chat on whether you’re willing to commit.

mass_effect_andromeda

Vetra

Vetra is a slow burn romance option, as the drifter takes a long time to open up to you. You’ll have only very limited opportunities to flirt with her prior to her loyalty mission – and you must seize every opportunity to lock in her interest. No matter what you do, Vetra’s romance won’t move past flirtation until Priority Ops 6, so be patient.

Don’t be discouraged if she doesn’t seem that receptive; although Vetra is more interested in male Ryders than female, she can be won over. Seems aliens have heard of the Kinsey scale. Look for Vetra in a storage room off the Cargo bay, although after her initial chat with you, she tends to spend her time in the crew quarters with Drack.

To cement things with Vetra, you need to do at least the following flirting:

  1. Choose “you’re intense” when you first chat on the Tempest.
  2. Ask about “anyone special
  3. in a subsequent chat on the Tempest.

  4. Say “I’m here for you both” during Vetra’s loyalty mission.
  5. Tell Vetra you’re “dreaming of someone”
  6. after objective Hunting the Archon.

  7. Check your email for an invitation, then have Vetra in your squad on a Kadara visit.

There are several cute scenes in Vetra’s romance after this, so go ahead and commit to the full relationship if you’re ready to forsake all others.

Commitment point: Vetra is only interested in commitment, so when you meet on Kadara and have a pash, you’ll have to make up your mind.

mass_effect_andromeda_reyes

Reyes Vidal

There’s been a lot of confusion about whether Reyes is available to both Ryder twins, but we’ve confirmed: he’s keen on both of them. Nevertheless, this is a weird relationship, as it is entirely possible to write Reyes out of the plot of your Mass Effect Andromeda playthrough altogether.

You can flirt with Reyes over and over again during the long quest to settle Kadara, which kicks off in Hunting the Archon. Whether you meet with him during that quest, you can check in with him after the Vehn interrogation at Tartarus Bar. Pursue the quests Murder in Kadara Port, Divided Loyalties, Precious Cargo and Night Out to advance things, and then meet with Sloane to bring the questline to its conclusion.

No spoilers, but whether Reyes sticks around and commits to you depends on your actions and choices. It’s him or – well. You’ll see. We promise it’s obvious.

mass_effect_andromeda_keri

Keri (fling)

A journalist who interviews Ryder on multiple occasions over the course of the game, Keri breaks with series tradition by not being someone you want to punch. She won’t be willing to start a relationship with you while the interviews are ongoing, but if you keep up the charm you can enjoy a one night stand with Keri when ethical considerations are no longer an issue. This is available even if you’re involved with someone else; it won’t affect anything. Look for Keri on the Nexus, in the docking bay or operations, depending on how far you’ve advanced Task: Path of a Hero. She’ll email you when a new interview slot is available.

People who won’t bang you, even if you really try

mass_effect_andromeda_dr_lexi_tperro

Lexi

The Tempest’s resident doctor maintains a strictly professional relationship to the crew – mostly. While male and female Ryders can both attempt a flirtation, Lexi knocks that on the head right out of the gate. You’ll have to settle for pining from afar. Drack, on the other hand, might have a chance – despite also being a patient of Lexi’s. Guess Ryder’s just not her type.

Paaran Shie

When you return to Aya after winning the trust of the Angara, you’ll have the freedom of the city – and that means you can track down governor Paaran Shie in her office and let her know you think she’s well fancy. Unfortunately, this hard-working administrator has no time for such frivolities. The bar is just down the road a bit if you need to drown your sorrows.

More coming soon.


Dark Souls 3: The Ringed City walkthrough – Ringed Inner Wall to Ringed City Streets

$
0
0

The Ringed City itself is guarded by Ringed knights and Halva knights, and honestly? They’re only the start of your problems.

dark_souls_3_the_ringed_city_dlc_6

This Dark Souls 3: The Ringed City walkthrough takes us on a long, long trek from the walls of The Ringed City down to the flooded ground level.

How long this takes is up to you. If you want to, you can skip over a lot of dead end treasure hunts, run past the most annoying baddies, and have it done by morning tea. Top tier players will also skip through this in no time. Otherwise, make sure you’re well hydrated; we’re in this for a while.

Before we start, let’s talk a bit about the main grunt enemy type in this area, which I’ve been calling the wretch. These guys are okay when you avoid their ambush and paddle them before they can attack, but you ought to know how they fight in open combat. They have a leap attack, which does heavy damage, so roll back ASAP to avoid it. Watch out for their combo; sometimes their slow vertical strike is just a slice, and other times it’s the start of several quick attacks, which will hit you if you’ve dived in expecting an opening.

They also have a nasty shove move they’ll use to put you off-balance. Additionally, some of them have a lightning attack, stabbing downwards with it like a knife or shooting rapid projectiles at you, and you don’t want any of that at all.

Alright, let’s go.

Ringed Inner Wall – Lapp and Ringed Knights

At the bonfire, notice the locked gate. Take the path opposite this and head down the corridor to go outside and speak to Lapp again. He’ll give you some Siegbrau. There’s an ember on a nearby corpse.

Return to the bonfire room and take the one doorway we haven’t checked yet. A wretch ambushes you from the left. An overgrown wretch falls down from above as you pass through the arch to the next corridor. These poor fellows are even further gone than their friends, sprouting crystals, and just being near them exposes you to curse – so keep your distance and take it slow.

Head down the stairs. Yes, the wretch halfway down is playing dead. Ping him with an arrow for safety’s sake, as it’s hard to give him a paddle without ending up in his attack zone. Put an arrow in the overgrown wretch waiting just outside the doorway, too; sometimes another wretch comes from above just outside, and sometimes not, and it’s better to be safe. Grab the hollow gem on the body further down the path.

Now things get a bit rough: here comes a ringed knight. The bloodstains and messages warn of under-estimating him, but not to worry, my darling cheeseburgers; he may be tough, but he’s not bright. Advance very cautiously till you see him begin walking towards you, then leg it back almost inside; if he doesn’t see you, wait a bit, then go back and snipe him where he stands across the small courtyard. Run away, rinse, repeat. Headshots, of course, to speed things up; to make this easier, he resets to a standing position, but usually not until after you approach the corner and peer around again. A weird foible of the AI here. If you have Spook or another means of silencing yourself, and optionally hidden body, you might care to try backstabs.

Be sure to check the corpse – these enemies drop embers, titanite chunks and pieces of the Ringed Knight set – and then circle the building in the area the ringed knight was patrolling. An overgrown wretch is waiting, guarding a titanite chunk.

There are two wretches with lightning attacks waiting to ambush you as you head down the stairs leading away from the ringed knight’s flower garden. Even the odds by shooting the one hanging on the wall to lure it out, and drop attack or snipe the other rather than going down the stairs into its ambush.

Continue on along the path down the stairs and a humpbacked man comes scurrying out at you. From a distance it casts some sort of spell that rises up at your feet, even if you’re out of sight and some distance away; this does heavy damage, very quickly, so never hold still. These enemies have a bit more health than wretches, and if you don’t take them down fast they cast a spell that heals them, shields them from melee attacks while in effect, and damages anyone near them. You can interrupt their ranged spell with attacks, and their healing if you hit several times as they’re starting to cast, but that’s dangerous.

Moving into the next building you’ll encounter two humpbacked men – one on patrol and one praying on the right as you enter. I ran away and came back after casting hidden body to sneak up and deal with them one by one. Be careful not to fall into the hole in the centre of the room as you fight. But wait, there’s more – a third humpback man patrols up the stairs into this room fairly regularly.

With the three weirdoes down, head cautiously down the stairs – not too fast! There’s another ringed knight down here. This would be any easy if dull cheese from the stairs, but there’s yet another humpbacked man hidden in a level between the top and bottom of the stairs; it can see you on the stairs and use its magic on you, and it’s very hard to take down from the stairs due to the angle and its stupid healing. Go back up to the top floor and find a view of it through the hole, and snipe it there. Then you can cheese the ringed knight in safety; it’s extra easy with hidden body, which I suddenly remembered I own during this DLC and will now never unequip. Then you can grab a shriving stone from the middle of the room.

Optional: go back up to the top floor and equip cat’s ring or Spook just to be safe, then drop carefully onto the chandelier. Stand right at the edge, just onto one of the circular bits along the rim, and roll to reach the middle balcony. Here you’ll find some twinkling titanite.

dark_souls_3_ringed_city_screen_swamp_knight_1

Three Halva knights on the stairs

As you pass out of this room and back into the fresh air, three Halva knights patrol up from the left. The door at the top of the stairs to the right is locked, so you can’t hide there, and there are lightning-tossing wretches around, so it’s best to duck back into the previous room so you can watch the patrol pattern for a while.

These Halva knights are a pain; they’re easy to avoid with sprinting or stealth but if you’re treasure hunting or not sure where you’re going, it’s way too easy to run splat into them while trying to fight or escape other enemies on side paths. It’s best to clear them out as you go – at least once. The good news is they’re easy to cheese, but only after we clear a few other threats first.

First, wait for a bit. One of the Halva knights will drop off the side of the stairs at the top, taking him out of the equation for a minute. These leaves two, only one of which [patrols past your doorway. While it’s heading back downstairs, peer out the door to your left and snipe the wretch on the bridge before it spots you and throws lightning. If it falls off the bridge run away and wait for it to return to its original position. Next, take out the wretch in the alcove just to the right of your doorway, just to be safe.

Head on across the stairs and approach the bridge, to either snipe or duel the wretch on the other side. You can then grab the mossfruit from the far side.

Cross back to the far side of the stairs, stay by the bridge, and look down, a little further down the stairs and across the gap to spot another overgrown wretch and a humpbacked man. You can snipe them now or ignore them, but be aware of them if you intend to drop attack and melee the patrolling Halva knights.

With these threats down or at least acknowledged, it’s pretty safe to go ham on the three Halva knights – drop attacks, sniping, whatever. The only other thing you need to consider is that there’s a wretch and an overgrown wretch in the little alley by the stairs with the one lonely Halva knight.

dark_souls_3_ringed_city_screen_1

Filinore, Seeker of the Spurned and more Ringed Knights

When all three Halva Knights are dead (or just in a gap during the patrol) you can go to the top of the stairs and speak several times to the woman behind the door. She’ll offer you a quest; accept for Filinore’s Sacred Chime.

Optional: go back to the bridge and explore the path leading away from it to spot a ringed knight across a circular area filled with lavender; he’s very easy to cheese. Try headshotting him and running away, then sneaking back with Spook to backstab him as he returns to his spot, to speed things up.

Optional: Explore the path leading out of the lavender area to encounter an NPC dark spirit called Seeker of the Spurned. He uses a crossbow and is immune to most cheeseburger tricks. If you beat him you get the Wolf Ring +3 and, from an item glow beyond him, the Black Witch set.

Head a little further down the stairs from the bridge and look left and across to spot a wretch you can snipe – but watch out for his lightning response. Another wretch ambushes you from the nearby alcove, in which you’ll find some mossfruit. Don’t go further down the stairs yet.

Optional: look on the other side of the stairs to find a lit passage; glance up to spot an overgrown wretch waiting in ambush before entering. Through the tunnel, two more overgrown wretches and one wretch await you on the ground. Around the corner, an overgrown wretch is overhead, and another overgrown wretch can be seen a little further beyond it. Outside, a ringed knight is on patrol, and there are at least two wretches hanging around above this area, waiting to ambush you – as well as one above who may throw lightning on the off-chance it sees you. Defeat or sneak past these threats for the Ringed Knight spear, and you can cross the bridge to speak to your old pal the cricket man NPC on the other side.

Whether it’s via the treasure hunting above or going straight down the stairs, when you get close to the swamp at the bottom of the stairs three Halva knights arise. Yes, more of them. Deal with them however you please; at this stage I’d done so much cheesing I was running low on cheap arrows and ended up using hidden body to sneak up on the still ones and cast pestilent mercury on them, figuring the time it took my sword’s Simple enchantment to refill my FP was worth less than the souls it costs for my expensive boss arrows. There’s a Soul of a Crestfallen Knight at the bottom of the stairs.

Optional: turn left as you hit the swamp and grab the titanite chunk on your right as you advance. Watch out for the hunchback man ahead – it has a new trick of spinning towards you very rapidly. Another two bunchback men are at the end of the path, guarding a Soul of a Crestfallen Knight. Search the walls in this area and you can find a ladder. Talk to your friend again at the top, then look around to spot a ringed knight. He’ll patrol after aggro, so cheese him using the stairs leading to your friend to break his line of sight after a shot right at the far end of his pattern. Unfortunately he has a friend; with one down, another ringed knight patrols up from further around the first one’s original position. He has a longer patrol zone so you need to be careful. You can also just stealth past him. Around the other side of the tower guarded by the two ringed knights you’ll find a wretch. Carry on across the balcony to find Lapp taking his ease in the round room at the end. Talk to him and grab the Covetous Gold Serpent Ring +3.

Optional: after climbing the ladder in the treasure hunt described above, walk away from the ringed knight and drop down to land on a rocky ledge. Climb all the way to the top to battle NPC dark spirit Silver Knight Ledo. It’s not really worth it; there are only titanite chunks up here. On the other hand, Ledo is really dim and can be tricked with hidden body and stealth, so you can cheese him with arrows. You’ll need cat’s ring or Spook to get down from here without taking damage. Do not fire on the grey giant from the tower; it will make your life extremely difficult.

From the bottom of the stairs, facing out into the swamp towards the distant grey giant, turn right and hug the wall closely to find a narrow path leading to the White Preacher Head.

Go back out and grab the dark gem in the water – don’t mind the little cricket men – they’re harmless.

Up next

Coming soon.

The bonfire is super close but there’s a new baddie between us and it – a cricket man. To find it, move around the area hugging the right wall again to find the enemy blocking a path lit by a torch. He has melee sorcery attacks, including a diving single stab and a series of stabs as he moves forward and a very long detection range. Also if you leave him alive long enough he talks in a creepy human voice, blerghhh. Feel free to draw him off and run around him if you can’t handle this right now; you’re probably carrying about 100,000 souls, after all.

In either case, go through the hole he had been blocking and grab the prism stones, then enter the doorway to light the Ringed City Streets bonfire. I’m honestly not sure I’ve ever been happier to see one.

Mass Effect Andromeda guide: Making an Impression – Architect Boss and Gas or Water

$
0
0

Mass Effect Andromeda throws a massive challenge at you, and we’re not talking about that boss fight.

mass_effect_andromeda_4k_screens_4

Mass Effect Andromeda‘s starting planet, Eos, is massive. The enormous world can actually be a bit overwhelming at first, and we recommend that you follow the core stor path for a while: Clear the Vault, clean the radiation, leave the planet, then return to Eos after finishing a few more priority ops such as the ‘A Trail of Hope’ series of story missions.

Once you’ve visited another planet or two, however, plot a course back to Eos: You’ll find some exciting new sidequests waiting, and you’ll find that awful Eos Radiation is gone at last. Freedom to explore!

Find more tips, tricks and explanations in our Mass Effect Andromeda guide and walkthrough.

One of the major new quests waiting for you when you do is Making an Impression. This quest has you investigating unusual seismic activity, and leads both to a big decision and a big fight. It’s worth the time.

Head to the settlement of Prodromos to collect the quest from some of your colonist scientists, then follow your waypoint to a location in the Sawtooth Plateau. Place your seismic hammer and battle the Remnant who appear in response.

Head southwest to the second waypoint location to drop the second seismic hammer. Again, you’ll have to battle a bunch of Remnant. So far so good, right?

Water or Gas? Making an Impression’s big story choice

As you head for the third waypoint you should spot a tent and some camping gear, and Ryder or a squad mate will comment on it. The objective changes to “investigate the strangers”.

Unfortunately this bit of the game is bugged, and the NPCs don’t always appear. if there’s nobody at the waypoint, fast travel away and then drive back, which should make them respawn. If necessary, leave Eos altogether and come back to the surface; that should make them show up.

After speaking to the strangers, you’ll see there are now two waypoints right next to each other amongst some Remnant ruins. You have a choice here:

  • Place the drill to mine gas, which you can trade to the exiles for water, while harming the environment.
  • Drill for water and potentially destroy the exile settlement downstream.

The good news is: this choice doesn’t matter at all. Absolutely nothing seems to change in the game no matter what you do. The choice might be saved for a sequel or DLC, however, so keep that in mind.

Head to the next waypoint, but be ready for a big fight before you drop the fifth seismic hammer. Make sure you have a mid to long range weapon with you if you normally use a shotgun or melee.

mass_effect_andromeda_architect_1

Architect boss battle: tips for killing the giant remnant

This big three-legged thing is called an Architect, and it is here to teach you two valuable lessons. One, Mass Effect Andromeda is not a cover shooter. Two, you probably should buy every Cobra RPG consumable you see, as they speed up these bullet sponge battles considerably.

Once you know what you’re doing, this battle isn’t difficult – just tiresome, because the Architect is a bullet sponge. It has three major attacks:

  • The first attack is a standard automatic gun which fires a brief but powerful barrage at you. The projectiles don’t penetrate cover, but they’re so slow moving that you can avoid them just by using your jumpjets to strafe around the Architect. That means you can keep firing the whole time.
  • The second attack is a small cluster of bombs, which detonate after a short fuse tick down. The Architect can easily lob these behind cover, so hiding won’t help you.
  • The third attack is a huge beam of energy that hits hard and leaves a briefly persistent area of effect on the ground. This attack penetrates cover so your only escape is to get out of the way. Before the beam fires, its area of effect is lit up in a red glow.

Architect battles loop through multiple phases:

  • Passive
    The Architect may fire at you but cannot be harmed in any way. Usually only occurs just after moving or at the start of a battle.
  • Leg conductors exposed
    Vents open on the Architect’s legs. Shoot them.
  • Head conductors exposed
    After you do enough damage to an Architect’s legs, it opens its mouth. Shoot it in the mouth.
  • Add phase
    After enough damage or time passes in a leg or head phase, the Architect will lean over and appear to vomit. It cannot be damaged during this phase. This summons Remnant adds. You must clear all the adds, while dodging the Architect’s continued attacks, before another damage phase will commence.
  • Moving
    After you destroy a leg, or perhaps when the total Architect damage reaches a certain threshold, it will move. It doesn’t go very far. Follow it, but also use the time to restock your ammo if there are crates handy.
  • Downed
    Once the Architect’s legs and head conductors have been destroyed, it falls to the ground. Ryder must rush up and interface with it to end the battle for good.

The easiest way we found to battle the Architect was just to fire at it with an assault rifle while bouncing from left to right and back again, shooting off damaging powers when possible. This allows you to dodge its attacks with ease, and when the mouth opens, you can lob in a cobra RPG to quickly end that phase. Defeat the adds as soon as possible; their tendency to distract you from dodging the Architect’s attacks are the real danger in the battle.

After you win, scan the architect’s body for research data, loot the reward chest nearby, and don’t forget to check in on it in orbit next time you visit the planet via the Galaxy Map.

To complete Making an Impression, return to Prodromos and hand in the quest.

Mass Effect Andromeda Remnant decryption guide: monoliths and glyph puzzles

$
0
0

Mass Effect Andromeda glyph puzzles are causing you headaches. Here are our top tips for solving alien sudoku – sorry, performing Remnant decryption – so you can activate those damned monoliths.

mass_effect_andromeda_guide08

Mass Effect Andromeda is littered with Remnant ruins – the scattered evidence of a long lost race of beings, now represented only by shattered, half-buried structures and mechanical automatons.

The Remnant, whatever they were, had access to amazing advanced technology – so alien that none of the races in Mass Effect Andromeda, be they Heleus locals or Milky Way arrivals, can interface with it. Except Ryder, of course, through the magical anchor – whoops! We mean SAM, the AI fused with their brain.

Find more tips, tricks and explanations in our Mass Effect Andromeda guide and walkthrough.

This is really important because each landable planet in Mass Effect Andromeda contains three monoliths covered in glyphs, which you’ll need to decrypt in order to access the vault, the central control system for all Remnant tech on the planet. Once you’ve explored the vault, which you can think of as a sort of dungeon, you’ll increase the planet’s viability – which is good news for everyone. For example, clearing the vault on Eos means you can come back after a few missions and find that annoying radiation has cleared.

You’ll also sometimes find glyph puzzles outside monoliths – on loot chests and side rooms in vaults, for example. In these cases the remnant decryption is like a red flag for something worth finding inside, so be sure to check it out. The good news is these puzzles don’t always require you to scan glyphs to complete, although most do.

Clearing monoliths by scanning glyphs in Mass Effect Andromeda

To track down monoliths in Mass Effect Andromeda, open your map on any landable planet and zoom out to spot three symbols that look like twisted spires. Click on one to activate and track a quest to activate all three. Once you’ve dealt with them, it’s off to the vault.

Unfortunately, resolving monoliths isn’t just a matter of shooting the baddies who protect it and looting any nearby containers, as with general Remnant ruins found all over Mass Effect Andromeda.

Thanks, Alienware!

Brenna is playing Mass Effect Andromeda on an Alienware 17 with a GX 1070, kindly loaned, at her request, by Alienware Australia’s PR representative.

For starters, you’ll need to locate any nearby glyphs. Glyphs are those weird symbols you’ll see when you try to interact with the central console at a monolith (and also in some other Remnant ruins and dungeons, on switches and chests. Because nobody speaks Remnant, you often need to work out some of the glyphs in order to be able to communicate with Remnant technology.

Most monoliths in Mass Effect Andromeda require three glyphs to solve. To find a glyph, open your scanner (D-pad down on consoles and G on PC) and examine the ground around the central console. You’ll see a number of glowing wires or paths leading away around the environment.

Voeld monolith

There’s a monolith on Voeld where the wires lead outside. You need to exit the cave and clamber around the back of the structure, where a Fiend awaits, to scan two of the three glyphs. For some reason it’s really hard to find the second glyph on the surface until you go back inside and scan the wires again. It’s probably a bug.

Track each of these wires from the base of the console to the far end and then scan the glyph they terminate at; in normal view it looks like a faint tracing of blue energy, but through your scanner it’s a glowing square, flat on a surface. This often means clambering all over the structures that surround the monolith, and many times the glyph will be on top of an object or behind it. Don’t forget to press the actual scan button once you find the glyph, and be sure there’s no object between you and it when you do so.

Once you track down every glyph attached to a monolith, either Ryder or SAM will tell you you’ve collected all the glyphs you need. Head back to the central console to begin Remnant decryption.

Remnant decryption in Mass Effect Andromeda

With all glyphs scanned, activate a monolith’s central console to begin Remnant decryption. This is the Remnant’s ancient secret security system, and it can only be bypassed by means of … sudoku.

The grids are usually smaller than regular numbered sudoku, and the divisions can be all sorts of shapes rather than just squares. The rules are the same, however: you cannot repeat a glyph in any row, column, or division.

If you’ve never played sudoku, there are all sorts of logic tricks to help you solve them and activate those monoliths. Here are our hot tips for Remnant decryption in Mass Effect Andromeda:

  • Find an empty square and click through (“browse”) all available glyphs. Give them nicknames so you can differentiate them easily. This just makes it a bit quicker, mentally, when you’re working out what’s missing from a row – like “I’ve got a hat, a pair of socks, the L and the hawk, so I need the jam jar”.
  • Look at the glyphs that have already been filled in. Are there any rows, columns or divisions that are missing just one glyph? If so, you can fill in the blank with whichever glyph is not already present.
  • Count all the types of glyphs and see which one is the most common. If you have three of one kind of glyph and the puzzle board only has four rows and columns, there’s only one place the remaining glyph of that kind can go without conflicting with its buddies.
  • If you find a row, column or division with just two missing glyphs, try both of them in the empty squares. Odds are you’ll see one of them can’t work in one of the spots, which means it has to go in the other.
  • Stuck? Check each individual square by row, column and division, one by one, to locate anything you might have missed; you probably only need to brute force just one glyph to set of a chain of logic on the others.
  • Try this sudoku tutorial for general tips on how to play.

If all else fails you can override Remnant decryption with keys, often found in Remnant ruins or sometimes purchased from shops.

By the way, you have to press the “submit solution” button once you finish the puzzle; it’s no good just solving it. If you’re wondering why your solution hasn’t been accepted, that may be why. (If you submit an incorrect solution, you’ll be attacked by Remnant.)

Once you’ve completed a Remnant decryption at each monolith, you’ll unlock the vault – where more Remnant decryption awaits you. You’ll be doing a lot of this in Mass Effect Andromeda, but practice makes perfect.

Mass Effect Andromeda Naming the Dead visual guide – screenshots and map locations for colonist bodies

$
0
0

Mass Effect Andromeda’s Naming the Dead quest, with screens and map images to help you track down and dismiss this early game quest journal hang-on.

mass_effect_andromeda_november_screenshots_1

Find more tips, tricks and explanations in our Mass Effect Andromeda guide and walkthrough.

Mass Effect Andromeda is full of great content, but Naming the Dead is definitely not one of its peak moments.

Naming the Dead is probably one of the most emotionally interesting of the many Task-tier quests you’ll pick up as you play Mass Effect Andromeda, but it’s a bit buggy, it keeps shouting at you as you explore Eos, and it has no map references to guide you. It’s just not fun to do, and you’ll almost certainly need a guide to complete it.

Thanks, Alienware!

Brenna is playing Mass Effect Andromeda on an Alienware 17 with a GX 1070, kindly loaned, at her request, by Alienware Australia’s PR representative.

The good news is: this is that guide. Screenshots, text descriptions, and map images show exactly where all the dead colonist bopdies are on Eos. With this, you can put Naming the Dead behind you – forever.

Do yourself a favour and finish Naming the Dead as soon as possible. It’s still best to do it after you’ve cleared the Eos vault and advanced the main Mass Effect Andromeda plot a little, to clear the radiation on Eos – that makes exploration much less of a chore – but when you’re ready to kick fof your Eos adventures, this is a great first priority.

Naming the Dead colonist body locations

1. Promise: Theo J. Harwell
Visit the Eos settlement ruin called Promise and search behind the buildings near the big circular structure for this body. If you’re back on Eos later in the game, there’s a merchant right nearby. Sorry the map cursor is off here; the spot you want is the little arrow where Ryder is standing.

mass_effect_andromeda_naming_the_dead_visual_guide_1_map_harwell

mass_effect_andromeda_naming_the_dead_visual_guide_1_screenshot_harwell

2. Resilience: Gordanus Trenitus
Head directly south from Theo J. Hartwell’s body until you reach Resilience, the second Eos settlement ruin. Go down to the lower level. The body is in an area with Kett mobile cover barriers. For some reason, it tends to bug out and vanish after scanning, so our screenshot shows the location, but not the body itself.

mass_effect_andromeda_naming_the_dead_visual_guide_2_map_trenitus

mass_effect_andromeda_naming_the_dead_visual_guide_2_screenshot_trenitus

3. Resilience: Thysa Ylar
Move further south from Gordanus Trenitus’s body and search along the balconies and stairs around the cluster of buildings to find this body. As you’ll see from the map, this body is very close to the last one.

mass_effect_andromeda_naming_the_dead_visual_guide_3_map_yar

mass_effect_andromeda_naming_the_dead_visual_guide_3_screenshot_yar

4. Resilience: Porter M. West
Search the gully east of the lower Resilience site for this body. Again, it’s really close to the last two.

mass_effect_andromeda_naming_the_dead_visual_guide_4_map_west

mass_effect_andromeda_naming_the_dead_visual_guide_4_screenshot_west

5. Northern monolith: Tegan C. Avante
This body is by a big rock by the road that goes past the monolith where you meet Peebee.

mass_effect_andromeda_naming_the_dead_visual_guide_5_map_avante

mass_effect_andromeda_naming_the_dead_visual_guide_5_screenshot_avante

6. Central monolith: Amira S. Pavlov
There are several bodies at the second monolith. Pavlov is on her back with one arm stretched out.

mass_effect_andromeda_naming_the_dead_visual_guide_6_map_pavlov

mass_effect_andromeda_naming_the_dead_visual_guide_6_screenshot_pavlov

7. Kett Research Centre: Darin T. Anton
Head to the Kett facility at the southernmost monolith and look for the autopsy room on the north side of the central complex; the body is on one of the tables.

mass_effect_andromeda_naming_the_dead_visual_guide_7_map_anton

mass_effect_andromeda_naming_the_dead_visual_guide_7_screenshot_anton

Note that you can always return to scan a body a second time to check the name, if you’re not sure which ones you’ve done so far. Except for that damned Turian in Resilience who vanishes! Truly, he is the final boss of Naming the Dead.

Naming the Dead is probably the only quest in Mass Effect Andromeda you’ll need this sort of assistance for; almost everything else has map icons, or is completed via random encounters. Don’t let it get you down.

The best weapons in Mass Effect Andromeda: our favourite assault rifles, shotguns and more

$
0
0
mass_effect_andromeda_wide_art_2

Mass Effect Andromeda’s best weapons

Mass Effect Andromeda fields a huge variety of weapons. Why slog through all those boring menus to find a good one, when we’ve listed the best weapons right here?

The “best weapon” will always be subjective – maybe you like how one handles, even if its damage is a bit lower, or perhaps you can’t deal with slow reload speed on an otherwise fine bit of kit. But we’ve selected these weapons based on their performance for particular, specialised roles, and explained our reasoning with each one, so you should find something to catch your eye – or at least give you some tips to help you sort out what you are looking for in a weapon, so you know where to funnel those precious research points.

If it’s all too much, don’t worry: if you stick to the examples we’ve provided here, you’ll be well set up to tackle whatever Heleus throws at you – no matter your playstyle.

mass_effect_andromeda_best_weapons_assault_rifle_m-8_avenger

Best Assault Rifle for spray-and-pray: M-8 Avenger

Choosing just one of Mass Effect Andromeda’s many assault rifles is a difficult task. Although the assault rifle is usually the weapon of choice for those who just want to play a straight shooter and not think about the RPG aspects of the game, there’s so much variety in this class that it’s easy to go wrong. Some of them are actually grenade launchers or lasers, or shoot in burst fire, or need charging before they let loose.

So in choosing a best overall assault rifle, we had the run-and-gun Mass Effect Andromeda player in mind: one who wants a gun that behaves as they’d expect from this class of weapons, with fully automatic fire and no fancy tricks to distract you. That leaves us with just three choices: the Cyclone, the M-8 Avenger, and the Thokin.

All three of these weapons deal comparable damage, but it’s the M-8 Avenger – a starter weapon, for goodness sake – that wins out with the best balance across clip size, accuracy and rate of fire. It’s a fantastic all-rounder. Get the highest rank blueprint, augment it, mod it up and combine with consumables for a deadly multitool suitable for any occasion. There’s a reason the Initiative packs this into every soldier’s starting kit.

Also try: the Thokin has comparable stats except that it needs reloading more frequently – but its projectiles track targets, which is pretty cool.

mass_effect_andromeda_best_weapons_assault_rfiel_headshots_n7_valkyrie

Best Assault Rifle for headshots: N7 Valkyrie

If you don’t mind trading in high rate of fire for extra accuracy, Mass Effect Andromeda fields a range of semi-automatic and burst assault rifles that favour precise shooting, for those who like to take down their foes with surgical strikes to weak spots. This group of guns is great for tactical cover play.

Of the four weapons in this paradigm, the stats show the N7 Valkyrie is supreme, with exceptional damage, rate of fire and accuracy, and a decent clip size of 16. It’s only slightly heavier than the Mattock, a close runner up, but otherwise outclasses it slightly in every category.

The only other burst-fire assault rifle that should give you pause is the Sweeper, which makes up for its lower damage with a higher clip size and a heat-sink style reload system – but since you can craft, augment and mod an N7 Valkyrie to mimic this effect if you like it, we don’t consider it a serious contender.

Also try: the Sandstorm has a low rate of fire and small clip, but it’s super accurate with high damage and has a built-in scope – it’s almost a sniper rifle.

mass_effect_andromeda_best_weapons_assault_rifle_damage_m-37_falcon

Best Assault Rifle for heavy damage: M-37 Falcon

If you’re playing a big soldier type who can carry heaps of heavy equipment, consider throwing an M-37 Falcon in your spare weapon slot.

Although it’s called an assault rifle, the M-37 Falcon is Mass Effect Andromeda’s grenade launcher. It has, as you’d expect, the absolute highest damage output of any “assault rifle”, and it’s reliably accurate, too.

Oh sure, it’s slow as heck and you have to reload after six shots, but this is the gun you pull out after you’ve knocked the shields down with a lighter, more rapid-fire gun. It’s the gun you point into the Architect’s mouth after you knock a leg conductor out. It’s the gun you rely on when the Fiends come calling and you want to take that armour bar down, fast.

Also try: honestly, nothing in the assault rifle class matches this baby for raw power. A Cobra RPG consumable or combat power like Omni-grenade is the closest you’ll get.

mass_effect_andromeda_best_weapons_shotgun_general_crusader

Best Shotgun for primary use: N7 Crusader

There’s a fair bit of variety in the shotgun category, although not as much as in assault rifles, so for our first shotgun category we’ve elected to focus on shotguns that follow the model you’d expect from the class: workable clip size, low rate of fire, and lovely high damage.

By these standards, there are two shotguns that stand out as absolutely the best in Mass Effect Andromeda, and the N7 Crusader has a very slight edge over the runner up, the Disciple. Its damage and accuracy are just a little bit better, and they have identical weight, clip size and rate of fire. It’s only drawback is its narrow focus – it hits the target in front of you, not a group.

Like other shotguns in this class the N7 Crusader has a slow reload speed, so as a primary weapon it favours those who like to get in and out quickly, and use powers and melee as often as rifles. It is the vanguard’s best friend, and well worth the effort of crafting up.

Also try: the Disciple really is the only comparable weapon. It fires spread projectiles which can hit groups rather than single targets, which you may prefer. It’s also very pretty, being an Asari weapon.

mass_effect_andromeda_best_weapons_shotgun_damage_dhan

Best Shotgun for high damage: Dhan

If you want to pack a shotgun for use not as a primary weapon but to hit very, very hard at close range, and potentially get you out of an emergency situation, Mass Effect Andromeda has you covered.

Of the two most powerful shotguns in the game, our pick is the Dhan. It only holds two shots per clip, but if you’re playing smart, those two shots – or maybe even just one of them – will be all you need. This baby packs a mean punch.

Like the N7 Crusader, the Dhan fires a straight projectile with no spread, so it’s great for beating up that one guy right in front of you rather than blasting away when you get swarmed. Get in close and pull it out after you drop an enemy’s shields to eat into that health bar most satisfactorily.

Also try: the Ruzad has comparable damage and boasts a three-shot clip with spread – but it’s also significantly heavier. Your choice.

mass_effect_andromeda_best_weapons_smg_shield_equalizer

Best SMG for eating shields: Equalizer

SMGs have been lumped into the pistol category, but there are loads to choose from if you go looking. These rapid-fire weapons are fantastic for taking down shields before you whip out something heavier to do actual damage, and they’re lighter than assault rifles, making them a great choice for those who favour heavy power usage.

Since damage is pretty standard across the whole category, what we look for in an SMG for shield work is a high rate of fire and a nice big clip. The Equalizer is the winner here, on balance: while it doesn’t have the highest rate of fire in the class, it has excellent accuracy to make up for this very small shortfall, meaning you waste fewer shots. The Equalizer is also the lightest of the higher-rated SMGs.

The only consideration here is that the Equalizer uses a heat-based reload system, meaning you have to let it cool down. If you don’t like that, look elsewhere. We’ve got a good suggestion below.

Also try: the N7 Hurricane is still an absolute beast. It has the best rate of fire and a nice big clip; just be wary of its lower accuracy and higher weight.

mass_effect_andromeda_best_weapons_heavy_pistol_scorpion

Best Pistol for heavy damage: Scorpion

If you want to do heavy weapon damage without lugging around assault rifles and shotguns, a heavy pistol is your best friend. These slow firing, hard-hitting, highly accurate hand guns are the perfect complement to a nice SMG. They come into play when the shields are down, the weak points are exposed, and you are ready to do a murder.

Our favourite weapon in this class is the Scorpion. It has very high damage for a pistol class weapon, and it fires sticky grenades. Sticky. Grenades. Not the most traditional handgun, we grant you, but deadly effective if you can master its timing.

There’s only one other weapon in the pistol class which approaches the Scorpion for all round performance, and that’s the Talon – but the Talon is a shotgun-style handgun, meaning it only works at close range. The Scorpion allows you to stand back and dish damage from safety.

Also try: newcomer the Ushior is an Angaran pistol with just one shot in the clip – but what a shot! Exceptional damage and accuracy make it a fantastic last measure, but its comparatively high weight will see it regretfully left behind by many an intrepid explorer.

mass_effect_andromeda_best_weapons_sniper_rifle_black_widow

Best Sniper Rifle: Black Widow

Sniping in Mass Effect Andromeda is a bit tricky, since it’s much harder to get your squadmates to run interference, and encounters rarely involve nice long sightlines. But if you’re the sort of skilled player who can make a sniper rifle work when you’re on the go, you have options.

The Black Widow remains best in class. Its damage is only fractionally lower than its rivals, and alone among the high damage snipers it holds three shots. That’s going to be important in Mass Effect Andromeda’s run-and-gun playstyle, which makes it difficult to take your one shot and then reset.

The Black Widow is also lighter than the others, with identical accuracy. Don’t get the Black Widow mixed up with its also-ran cousin the Widow; that heavier variant has just one shot and a lower rate of fire.

Also try: the Isharay has the highest damage in the sniper rifle class. It’s heavy and one shot only, but with a good multiplayer crew for support it would be deadly indeed.

mass_effect_andromeda_best_weapons_melee_asari_sword

Best Melee: Asari Sword

Melee weapons come in all sorts of shapes and sizes in Mass Effect Andromeda, and fall into various classes. Daggers and biotic amplifiers do light but fast damage. Omni-tools are a little slower, but hit harder. Gauntlets are slow with low damage, but have an elemental effect. Hammers hit very hard, knock enemies down, and are relatively fast. Swords tend to hit hard, but be a bit slow to wind up.

But the Asari Sword? The Asari Sword is a thing of beauty. It has the highest damage output of any melee weapon in the game, and there is no reason to give even a single shit about how slow its attack windup animation is, because you will blink out of existence during the biotic animation, making you briefly invulnerable. It. Is. Glorious.

The image shows one we crafted up to complement a vanguard run, by the way. You can do some really special things with augments, if you’re focused on a particular build.

Also try: the Krogan Hammer also has a unique animation and very good damage and attack speed. A fantastic second choice if you’re not an Asari fan.

mass_effect_andromeda_best_weapons_bonus_sidewinder

Best weapon to pack because why not: Sidewinder

There’s really no excuse to put the Sidewinder on a “best weapons” list, except that it’s super fun. This six-shot gun has a classic revolver aesthetic, and you are welcome to ask everyone what time it is before you unholster it, so you can then inform that it is high noon.

Sidewinder is a pretty average gun. It does better damage than an SMG, and its rate of fire and accuracy are more than reasonable. This doesn’t really make up for its small clip size, but in an emergency it’s really cool to pull it out and fan the hammer. Maybe those six shots are all you need?

As another bonus it weighs very little, so if you’ve got the space, hey: why not pack it? It is super cool.

Also try: if you’re looking for a very light weapon that behaves differently from others in the class, the Razerad is a weird gun that increases its rate of fire as you hold the trigger down. It has a huge clip, too.

Viewing all 10714 articles
Browse latest View live